

Discover the diverse landscapes, vibrant cities, and cultural wonders that make the USA an exciting destination for adventurers. This comprehensive guide will help you plan the perfect trip, whether you're exploring iconic landmarks like the Grand Canyon or immersing yourself in the rich cultures of cities like New York and Chicago. Uncover the best hiking trails, camping spots, and national parks, while getting insider tips on budget accommodations and transportation. From the majestic mountains of the West to the charming coastlines of the East, this guide has everything you need for an unforgettable backpacking experience in the USA. Get ready for an adventure of a lifetime!
Why Go Backpacking in America (US)?
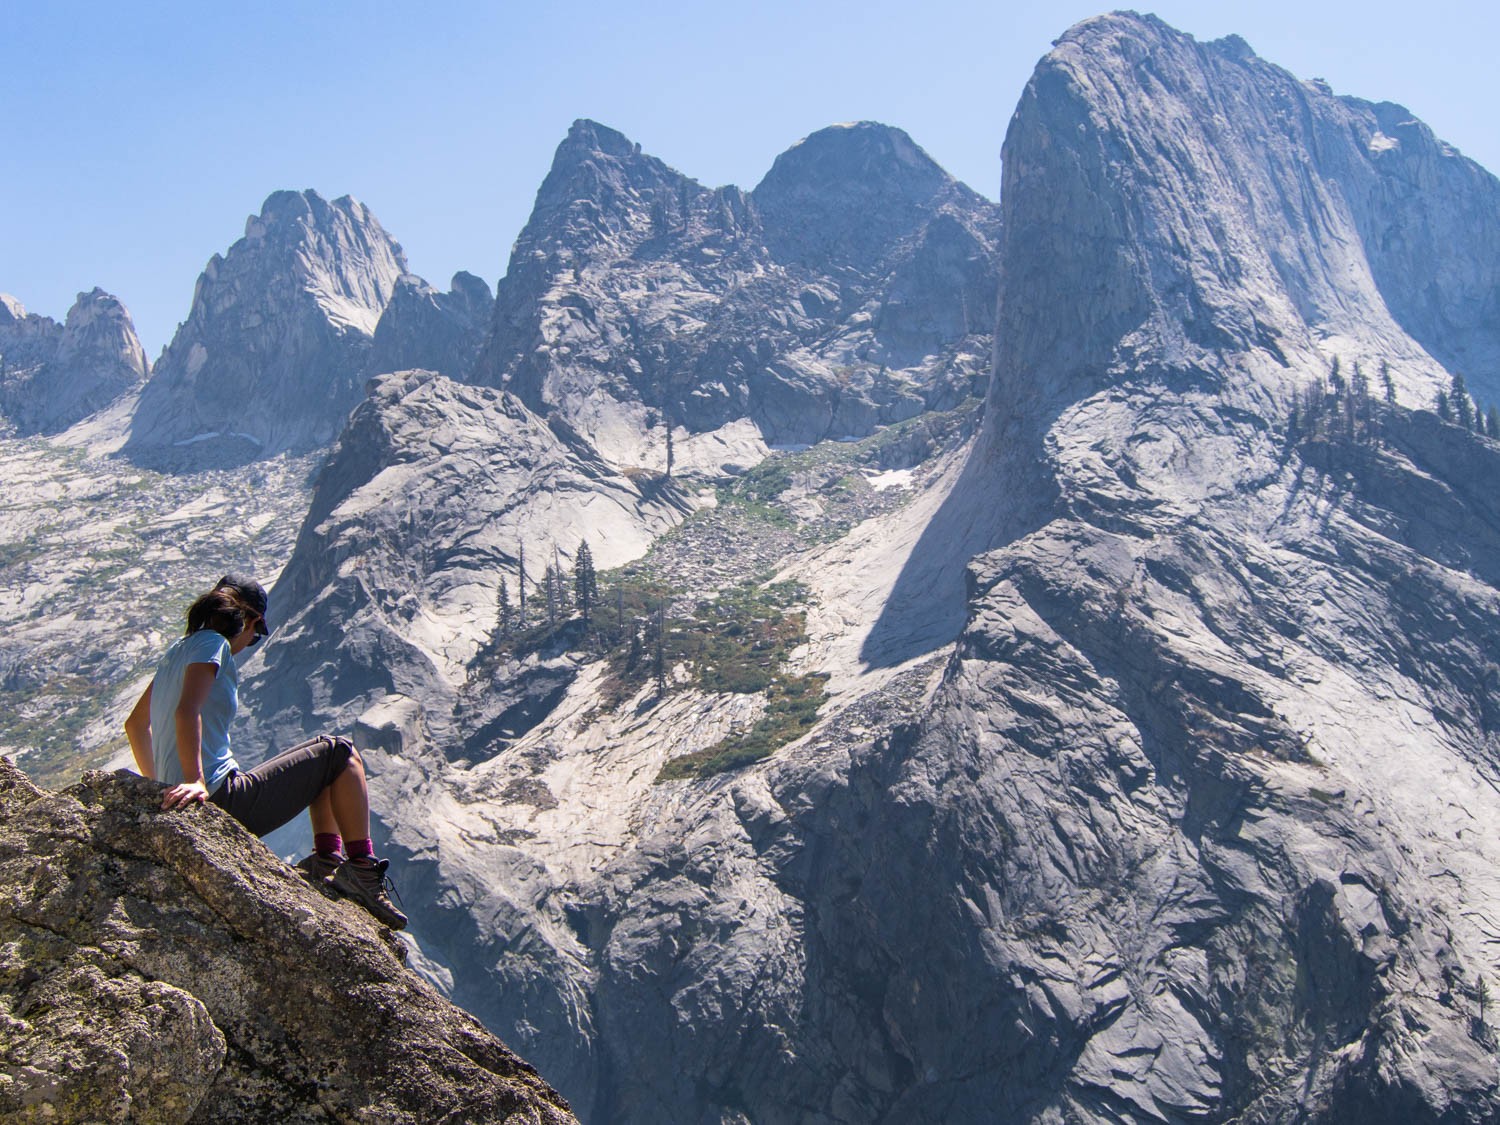
Backpacking in America offers a multitude of reasons to embark on an unforgettable adventure. The country's diverse natural beauty, encompassing magnificent landscapes like the Grand Canyon, Rocky Mountains, and California coastlines, provides a captivating backdrop for exploration.
The extensive network of national parks, including Yellowstone and Yosemite, presents numerous opportunities for outdoor activities and showcases the nation's stunning biodiversity. America's cultural diversity is another compelling aspect, with bustling cities, quaint towns, and rural communities offering a rich tapestry of traditions, cuisines, and experiences.
The sense of adventure is palpable as you traverse Alaska's rugged terrains, cruise along Route 66, or trek through the Appalachian Mountains. The country's well-developed backpacking infrastructure, ranging from campsites to budget accommodations, facilitates planning and execution.
Americans are known for their friendliness, ensuring encounters with welcoming locals who can offer insights and recommendations. Beyond the physical journey, backpacking in America can foster personal growth, self-discovery, and a broader understanding of the world. With careful planning, an American backpacking trip can be an enriching and transformative experience.
Best 10 Travel Trial for Backpacking the USA:
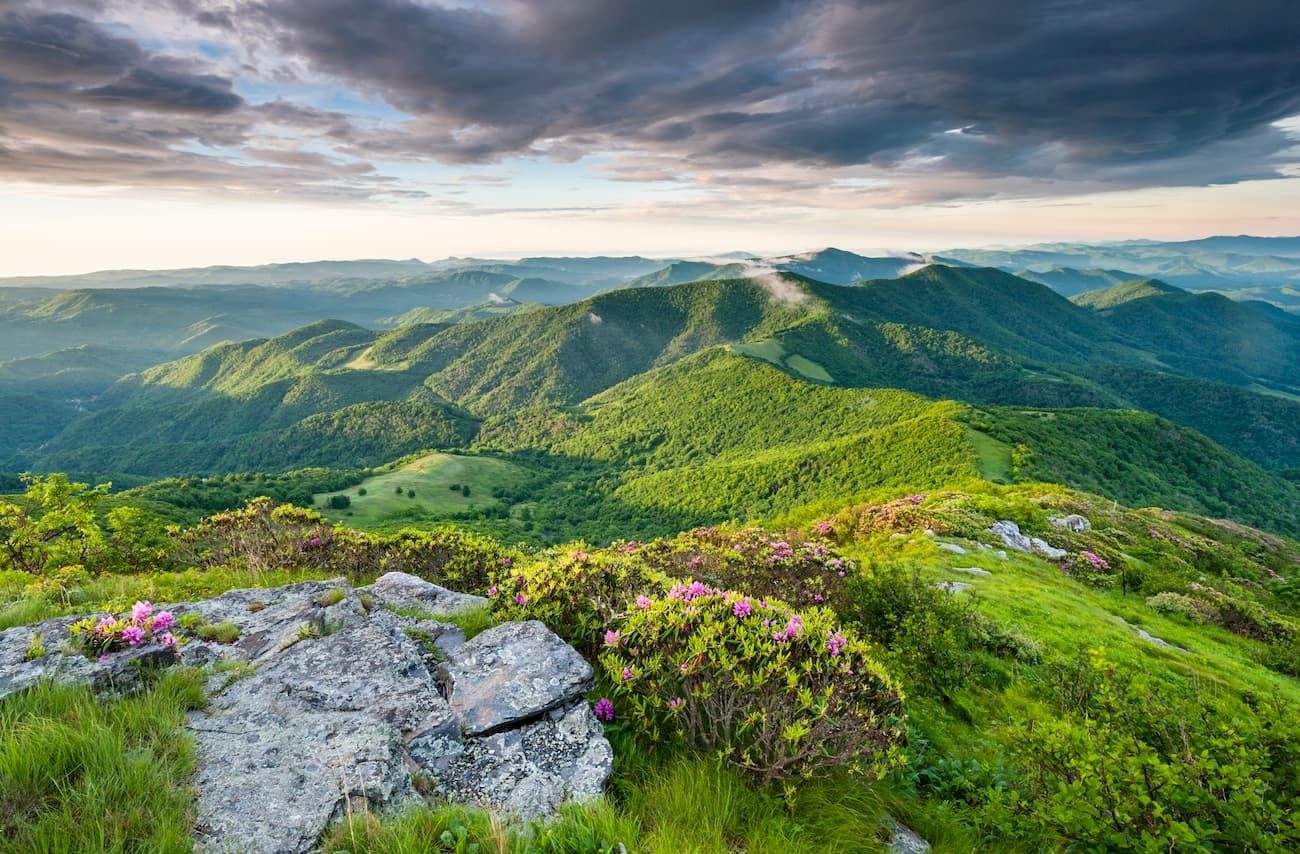
01. Appalachian Trail (East Coast):
- Route: The Appalachian Trail (AT) spans about 2,200 miles, starting at Springer Mountain in Georgia and ending at Mount Katahdin in Maine. It passes through 14 states, including Georgia, North Carolina, Tennessee, Virginia, West Virginia, Maryland, Pennsylvania, New Jersey, New York, Connecticut, Massachusetts, Vermont, New Hampshire, and Maine.
- Distance: The entire trail is approximately 2,200 miles long. However, the distance covered during a backpacking trip will vary depending on the section you choose to hike.
- Days: The duration of a backpacking trip on the Appalachian Trail can vary significantly. A thru-hike, covering the entire trail, usually takes hikers around 5 to 7 months to complete, but experienced hikers going for fastest known times have completed the entire trail in under 50 days.
- Permit Required: While there is no specific permit required to hike the entire Appalachian Trail, some sections may require permits or reservations for camping or entry into certain areas. It's important to research the specific regulations and permit requirements for the sections you plan to hike.
- Skill Level: The Appalachian Trail offers sections suitable for hikers of varying skill levels. Some sections are more challenging, while others are more accessible for beginners. It's important to assess your hiking experience, physical fitness, and the difficulty level of the section you plan to hike.
- Suggested Time: The suggested time to hike the Appalachian Trail varies depending on the section you choose and your hiking pace. Thru-hikers typically start in early spring or late spring and complete the trail by late summer or early fall. Section hikes can be planned based on personal preference and the best time to visit each section.
- Highlights: The Appalachian Trail offers numerous highlights along its route, including stunning mountain views, dense forests, charming shelters, wildlife encounters, and the opportunity to meet fellow hikers from around the world. Some notable highlights include the Great Smoky Mountains, Shenandoah National Park, the White Mountains, and the picturesque views from McAfee Knob and Mount Katahdin.
- Activities: Hiking is the primary activity on the Appalachian Trail. However, there are also opportunities for wildlife viewing, birdwatching, photography, and learning about the cultural and natural history of the areas the trail passes through. Some sections offer side trails for additional exploration, such as the side trail to Clingmans Dome in Great Smoky Mountains National Park.
- Scenic Drives: While the Appalachian Trail is primarily a hiking trail, there are several scenic drives that provide access to nearby areas and viewpoints. Some notable scenic drives near the trail include the Blue Ridge Parkway in Virginia and North Carolina, Skyline Drive in Virginia, and the Kancamagus Highway in New Hampshire.
Travel Itineraries for Appalachian Trail (East Coast):
Day 1: Springer Mountain, Georgia:
- Start your journey at Springer Mountain, the southern terminus of the Appalachian Trail.
- Hike approximately 8 miles to Stover Creek Shelter and spend the night there.
Day 2: Neels Gap, Georgia:
- Continue hiking through the beautiful Georgia wilderness.
- Reach Neels Gap, where you can resupply at the outfitters and spend the night at Mountain Crossings hostel.
Day 3-7: North Carolina:
- Cross into North Carolina and experience the changing landscape.
- Hike through the Great Smoky Mountains National Park and enjoy the stunning views.
- Camp at shelters or designated campsites along the trail.
Day 8-14: Tennessee:
- Enter Tennessee and continue your journey through the rolling hills and scenic vistas.
- Pass through the Roan Highlands, known for their breathtaking beauty.
- Take your time to soak in the natural splendor and wildlife of the area.
Day 15-28: Virginia:
- Enter Virginia, the state with the longest stretch of the Appalachian Trail.
- Experience the famous Grayson Highlands State Park, where you can encounter wild ponies.
- Pass through iconic sections like McAfee Knob and Tinker Cliffs.
- Take breaks to explore nearby towns and resupply at trail-friendly locations.
Day 29-36: Pennsylvania and New Jersey:
- Traverse through the rocky terrain of Pennsylvania.
- Explore the historic town of Harpers Ferry, West Virginia, where the Appalachian Trail Conservancy is located.
- Cross into New Jersey and hike through the beautiful Delaware Water Gap National Recreation Area.
Day 37-43: New York and Connecticut:
- Enter New York and enjoy the scenic beauty of the Hudson River Valley.
- Cross into Connecticut and hike through picturesque forests and farmlands.
- Take breaks to visit charming towns and sample local cuisine.
Day 44-49: Massachusetts, Vermont, and New Hampshire:
- Enter Massachusetts and hike through the Berkshires, known for their natural beauty.
- Cross into Vermont and experience the Green Mountains.
- Enter New Hampshire and tackle challenging sections like the White Mountains and the Presidential Range.
- Enjoy stunning views from Mount Washington and other notable peaks.
Day 50: Mount Katahdin, Maine:
- Arrive at Mount Katahdin, the northern terminus of the Appalachian Trail.
- Celebrate your accomplishment and savor the sense of achievement.
- Take time to rest and reflect on your incredible journey.
Note: This itinerary is a general outline and may need adjustments based on your hiking pace, weather conditions, and personal preferences. It's important to plan ahead, be prepared with appropriate gear, and check for any trail closures or restrictions along the way.
02. Pacific Crest Trail (West Coast):
- Route: The Pacific Crest Trail (PCT) spans approximately 2,650 miles, starting at the U.S.-Mexico border near Campo, California, and ending at the U.S.-Canada border in Manning Park, British Columbia.
- Distance: The entire trail covers about 2,650 miles, but the distance covered during a backpacking trip will vary depending on the sections you choose to hike.
- Days: The duration of a backpacking trip on the Pacific Crest Trail can vary significantly. Thru-hiking the entire trail usually takes hikers around 5 to 6 months to complete, depending on their pace. Section hikes can be planned based on personal preference and the specific sections you choose to explore.
- Permit Required: Yes, a permit is required for thru-hiking the Pacific Crest Trail. The Pacific Crest Trail Association (PCTA) issues long-distance permits for thru-hikers. It's essential to apply for a permit in advance and familiarize yourself with the specific regulations and requirements set by the PCTA.
- Skill Level: The Pacific Crest Trail offers sections suitable for hikers with varying skill levels. While some sections may present challenging terrain and weather conditions, others are more accessible. Thru-hiking the entire trail requires a higher level of physical fitness and backpacking experience.
- Suggested Time: The suggested time to hike the Pacific Crest Trail depends on the sections you choose and your hiking pace. Thru-hikers typically start in late April to early May in Southern California to take advantage of more favorable weather conditions and snowmelt. Completing the trail by September or early October is common to avoid winter conditions in the northern sections.
- Highlights: The Pacific Crest Trail showcases diverse landscapes and natural wonders along its route. Some highlights include traversing the desert landscapes of Southern California, hiking through the majestic Sierra Nevada mountains, passing through the volcanic landscapes of the Cascades, and exploring the beautiful forests of the Pacific Northwest.
- Activities: Hiking is the primary activity on the Pacific Crest Trail. However, there are also opportunities for wildlife spotting, birdwatching, photography, and solitude in nature. The trail passes through several national parks and wilderness areas, providing opportunities for exploration and side trips to stunning lakes, peaks, and viewpoints.
- Scenic Drives: While the Pacific Crest Trail is primarily a hiking trail, there are several scenic drives that provide access to nearby areas and viewpoints. Some notable scenic drives near the trail include the Tioga Road in Yosemite National Park, the North Cascades Scenic Highway in Washington, and the Crater Lake Rim Drive in Oregon.
Travel Itineraries for Pacific Crest Trail (West Coast):
Day 1: Campo, California:
- Start your journey at the U.S.-Mexico border near Campo, California. Hike approximately 20 miles to Lake Morena Campground and spend the night there.
Day 2-7: Southern California:
- Continue hiking through the beautiful landscapes of Southern California. Pass through Mount Laguna, Warner Springs, and Anza-Borrego Desert State Park. Camp at designated spots and water sources along the trail.
Day 8-14: San Jacinto Mountains and Big Bear Lake:
- Enter the San Jacinto Mountains and enjoy the scenic beauty of this region. Pass through the mountain towns of Idyllwild and Big Bear Lake. Resupply and restock in these towns before continuing your journey.
Day 15-28: Mojave Desert and the High Desert:
- Hike through the Mojave Desert section, experiencing the unique desert landscapes. Pass through Wrightwood, Cajon Pass, and Deep Creek Hot Springs. Cross the Mojave River and enter the High Desert region.
Day 29-42: Sierra Nevada Mountains:
- Enter the Sierra Nevada Mountains and embark on an incredible alpine journey. Pass through Kennedy Meadows and experience the stunning scenery of the Sequoia and Kings Canyon National Parks. Hike through the John Muir Wilderness and cross stunning passes such as Forester Pass and Muir Pass.
Day 43-56: Northern California:
- Continue through Northern California, passing through the beautiful forests and lakes. Reach the Oregon border, passing by the Trinity Alps, Castle Crags State Park, and Mount Shasta. Resupply in towns like Etna and Mount Shasta along the way.
Day 57-71: Southern Oregon:
- Enter the scenic landscapes of Southern Oregon and hike through the Cascade Range. Pass by majestic volcanoes like Mount McLoughlin and Crater Lake National Park. Enjoy the beauty of the Sky Lakes Wilderness and the Rogue River-Siskiyou National Forest.
Day 72-88: Central Oregon:
- Continue through Central Oregon, known for its diverse landscapes. Pass through the Three Sisters Wilderness and the Mount Washington Wilderness. Cross the lava fields of the McKenzie Pass and hike through the Mount Jefferson Wilderness.
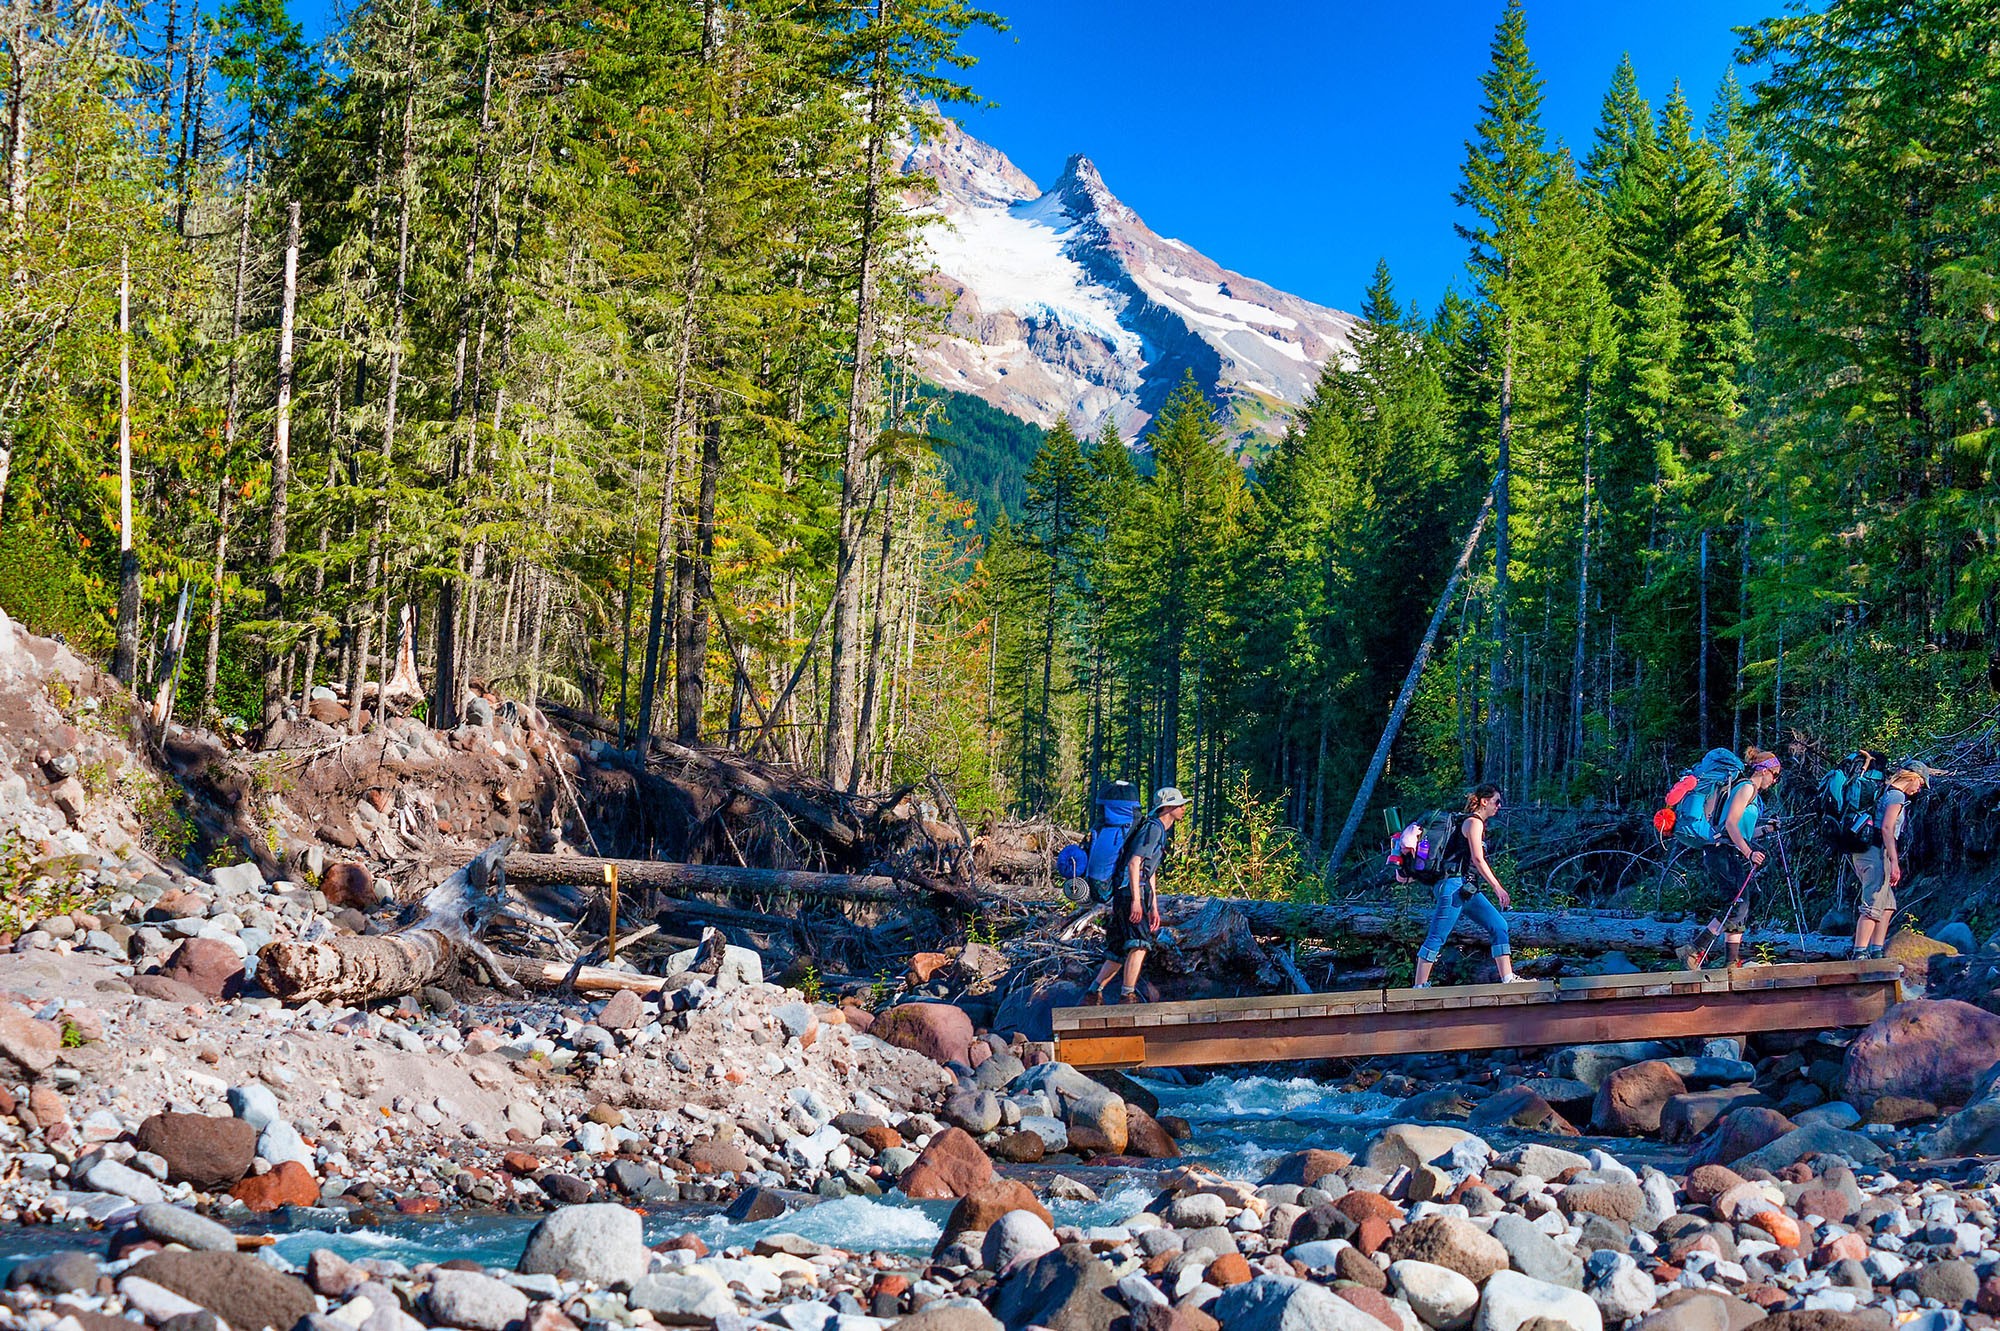
Day 89-104: Mount Hood and Columbia River Gorge:
- Reach Mount Hood and hike through the stunning Mount Hood National Forest. Pass through the Columbia River Gorge, known for its breathtaking waterfalls. Enjoy the views of the Columbia River and resupply in nearby towns.
Day 105-120: Washington:
- Enter Washington state and experience the beauty of the North Cascades. Hike through the Pasayten Wilderness and Glacier Peak Wilderness. Enjoy the stunning landscapes and pristine alpine lakes along the way.
Day 121-135: Goat Rocks Wilderness and Mount Rainier National Park:
- Pass through the iconic Goat Rocks Wilderness, famous for its stunning views. Enter Mount Rainier National Park and experience the grandeur of the Cascade Range. Enjoy the beauty of Mount Rainier and the surrounding peaks.
Day 136-150: Alpine Lakes Wilderness and Snoqualmie Pass:
- Hike through the Alpine Lakes Wilderness, known for its picturesque lakes and rugged mountains. Reach Snoqualmie Pass and enjoy the amenities of the ski resort area. Restock supplies and continue towards the North Cascades.
Day 151-165: North Cascades National Park and Pasayten Wilderness:
- Pass through North Cascades National Park, renowned for its dramatic landscapes. Hike through the beautiful Pasayten Wilderness. Enjoy stunning views of the surrounding mountains and valleys.
Day 166-180: Canadian Border and Manning Park, British Columbia:
- Reach the U.S.-Canada border and complete your journey on the Pacific Crest Trail. Cross into Manning Park, British Columbia, the northern terminus of the trail. Celebrate your incredible accomplishment and enjoy the sense of achievement.
Day 181-190: Rest and Exploration in Manning Park:
- Take a few days to rest and recover from your long hike. Explore the beautiful surroundings of Manning Park and enjoy recreational activities such as hiking, fishing, or simply relaxing in nature. Reflect on your journey and savor the memories of your PCT adventure.
03. John Muir Trail (California):
- Route: The John Muir Trail (JMT) starts in Yosemite National Park and follows a southbound route through the Sierra Nevada mountain range, passing through several other iconic destinations, including Kings Canyon National Park and ending at the summit of Mount Whitney.
- Distance: The John Muir Trail is approximately 211 miles long.
- Days: The number of days required to complete the John Muir Trail will vary depending on your hiking pace, fitness level, and desired itinerary. On average, hikers take around 2 to 3 weeks to complete the entire trail. Some experienced hikers may complete it in fewer days, while others may take longer.
- Permit Required: Yes, a permit is required to hike the John Muir Trail. It is issued through a lottery system, and hikers can apply for permits through recreation.gov. It's important to plan well in advance and familiarize yourself with the permit application process and regulations.
- Skill Level: The John Muir Trail is considered a challenging backpacking trail. Hikers should have previous backpacking experience, be comfortable with long-distance hiking, and have good physical fitness. It involves significant elevation gains and losses and requires proper planning and preparation.
- Suggested Time: The suggested time to hike the John Muir Trail is typically from July to September, as this is when the trail is typically snow-free and more accessible. It's important to consider the weather conditions and consult current trail reports before planning your hike.
- Highlights: The John Muir Trail offers breathtaking scenery and numerous highlights along its route. Some notable highlights include the iconic Half Dome and Yosemite Valley, the pristine lakes of the High Sierra, the Ansel Adams Wilderness, the Evolution Basin, and the majestic summit of Mount Whitney.
- Activities: The primary activity on the John Muir Trail is hiking and backpacking. However, there are also opportunities for fishing in the many lakes and streams along the trail. Wildlife viewing, photography, and stargazing are also popular activities. It's important to follow Leave No Trace principles and respect the wilderness environment.
- Scenic Drives: While the John Muir Trail is a hiking trail, there are scenic drives that provide access to nearby areas and viewpoints. For example, Tioga Road in Yosemite National Park offers stunning views of the high country and serves as a gateway to the trailhead. The drive along the Eastern Sierra Scenic Byway (Highway 395) also offers breathtaking vistas of the Sierra Nevada range.
Note: The John Muir Trail is a popular and heavily regulated trail. It's essential to obtain the necessary permits, familiarize yourself with the trail regulations, and plan your hike meticulously, considering resupply points, water sources, and potential challenges along the way.
Travel Itineraries for John Muir Trail (California):
Day 1: Happy Isles to Sunrise Creek
- The climb out of the valley is challenging but the breathtaking views make it worthwhile. It's a long and demanding first day, so I decided to set up camp a little before Sunrise Lakes. It's important to note that depending on the time of year, water sources in this area may be limited, so it's essential to check for availability before your trip.
Day 2: Sunrise Creek to Tuolumne Meadows
- After a short but steep morning climb, you'll be rewarded with an easy downhill hike through beautiful meadows. I recommend taking a one-mile detour to Cathedral Lakes, which is a perfect spot for a lunch break. Keep in mind that there is no camping within a 4-mile radius of Tuolumne Meadows, so you must reach their backpacker's campground before nightfall. The campground fee is $6 per person, payable by cash or credit card.
Day 3: Tuolumne Meadows to Lyell Canyon
- The trail is mostly flat throughout the day until you start ascending Donahue Pass. I highly recommend camping at the second "Lyell Fork" at mile 34.4 to be closer to the base of Donahue Pass. This campsite offers an opportunity for an alpine swim and has numerous available campsites.
Day 4: Lyell Canyon to Rosalie Lake
- You'll traverse Donahue and Island Passes, enjoying the lunch break at Island Pass with its stunning views. The trail takes you around Thousand Island and Garnet Lakes, making for a long day. Although my initial plan was to camp at Rosalie Lake, fatigue and hunger led me to stop at Shadow Creek Junction. This location boasts several campsites and offers incredible sunset views.
Day 5: Rosalie Lake to Reds Meadow (RESUPPLY)
- This day involves a resupply stop at Reds Meadow. For more detailed information, please refer to the Resupply Strategy for the John Muir Trail. You can choose to camp at the backpacker's campground ($23/night) or book a cabin through the resort. Shuttles to Mammoth ($20 round trip) are available if you prefer staying in town. Reds Meadow is an ideal place to take a well-deserved afternoon break, enjoying a shower, hot meal, and some rest.
Day 6: Reds Meadow to Purple Lake
- The entire day is a gradual uphill hike, and the visibility may be affected by smoke or haze. I had initially planned to camp at Lake Virginia, but I decided to stop a bit earlier at Purple Lake instead. Once you reach the lake, take the Ram Trail to find numerous amazing campsites overlooking the lake.
Day 7: Purple Lake to Mono Creek
- Start the day with a climb up to Lake Virginia, offering beautiful views and sparkling water. You'll then embark on the hike up Silver Pass, which, although challenging, rewards you with stunning vistas. After descending for about 1000 ft., you'll reach Squaw Lake—a perfect spot for lunch and an afternoon swim. The remaining ascent and descent take you to Mono Creek. The last 6 miles of the day are a long downhill stretch, which may surprise you with its intensity.
Day 8: Mono Creek to Vermilion Valley Ranch (afternoon "nero")
- I decided to take a 2-day detour to Vermilion Valley Ranch (VVR) based on the recommendation of many people, and it exceeded my expectations. Arriving at VVR, you'll be greeted with a complimentary drink and can enjoy amenities such as laundry facilities, showers, hot food, hiker boxes, and the opportunity to meet fellow hikers. The trail to VVR from Mono Creek follows a scenic route around Edison Lake for 7 miles. In most years, a ferry shuttles hikers across the lake, but unfortunately, it wasn't operational during my trip due to low water levels. Therefore, I took the trail instead.
Day 9: Marie Lake to Muir Trail Ranch (afternoon "nero")
- To get back to the John Muir Trail from VVR, you have a few options. If you don't want to miss any JMT miles, you can take the Mono Creek Trail back the same way you came. However, if you don't mind skipping about 4 miles of trail and avoiding a 2000 ft. climb, you can take the Bear Ridge trail instead.
Day 10: Mono Creek to Marie Lake
- Start your day early to tackle the climb before the heat sets in. The first 4 miles involve a 2000 ft. gain, but the trail levels out after that. While the trail is mostly exposed, you'll come across Bear Creek, which is an excellent spot for lunch and a chance to cool off your feet. Once you reach Marie Lake, I highly recommend hiking a quarter mile beyond the lake to find a rocky outcrop that offers stunning views. There are plenty of epic campsites in this area.
Day 11: Marie Lake to Muir Trail Ranch (RESUPPLY)
- The day begins with a short climb up and over Selden Pass. Make sure to take a moment at the top to admire the incredible views of Marie Lake. The rest of the hike to Muir Trail Ranch is relatively easy, but remember to fill up on water at Sallie Keys Lakes since there are no other water sources until you reach the ranch. When approaching MTR, follow the correct junction to save an extra 1.5 miles (unlike my mistake). After resupplying at MTR, take the opportunity to relax at the natural hot springs and find a camping spot nearby. Enjoy some well-deserved time off.
Day 12: Muir Trail Ranch to Evolution Lake
- This day involves a gradual uphill hike to Evolution Lake. The trail follows a beautiful river and offers scenic views of waterfalls. As you enter Kings Canyon National Park, consider taking a lunch break at McClure Meadows. The final 5-mile climb leads to Evolution Lake, which is simply breathtaking. There are numerous fantastic campsites to choose from. Don't miss the chance to take an alpine dip and witness the sunrise—trust me, it's worth it.
Day 13: Evolution Lake to Kings River Fork
- This day is highlighted by crossing Muir Pass, which brings you to the iconic Muir Hut—a sight you've likely seen in countless pre-trail pictures. The ascent to Muir Pass is not too challenging, but the descent can be rough due to rocky and exposed terrain. Finding spots for lunch can be limited, so make sure to choose a shaded area. As you head into Le Conte Canyon, you'll find plenty of camping options. I personally preferred to go further down the canyon to be closer to the next day's climb.
Day 14: Kings River Fork to Upper Palisades Lake
- On this day, you'll conquer the famous Golden Staircase—a challenging climb with numerous switchbacks and elevation gain. However, it's not as daunting as it may seem, and the rewards are worth it. When you reach Lower Palisades Lake, take a refreshing swim break in its crystal-clear waters. The final push of the day takes you up to Upper Palisades Lake. While there may be limited camping options near the lake itself, there are a few good spots that offer scenic views. Remember to fetch water from the nearby creek as your water source for the night.
Day 15: Upper Palisades Lake to Sawmill Pass Trail
- Prepare for a day of crossing two passes over 12,000 ft. elevation. You'll start by crossing Mather Pass, descending into the valley, and then climbing up and over Pinchot Pass. It's a long day, but the breathtaking views and stunning alpine lakes make it worthwhile. While camping options may be limited, I managed to find a spot near a creek at the Sawmill Pass Trail junction, although it was quite windy and sticky due to sap.
Day 16: Sawmill Pass Trail to Kearsarge Pass Trail
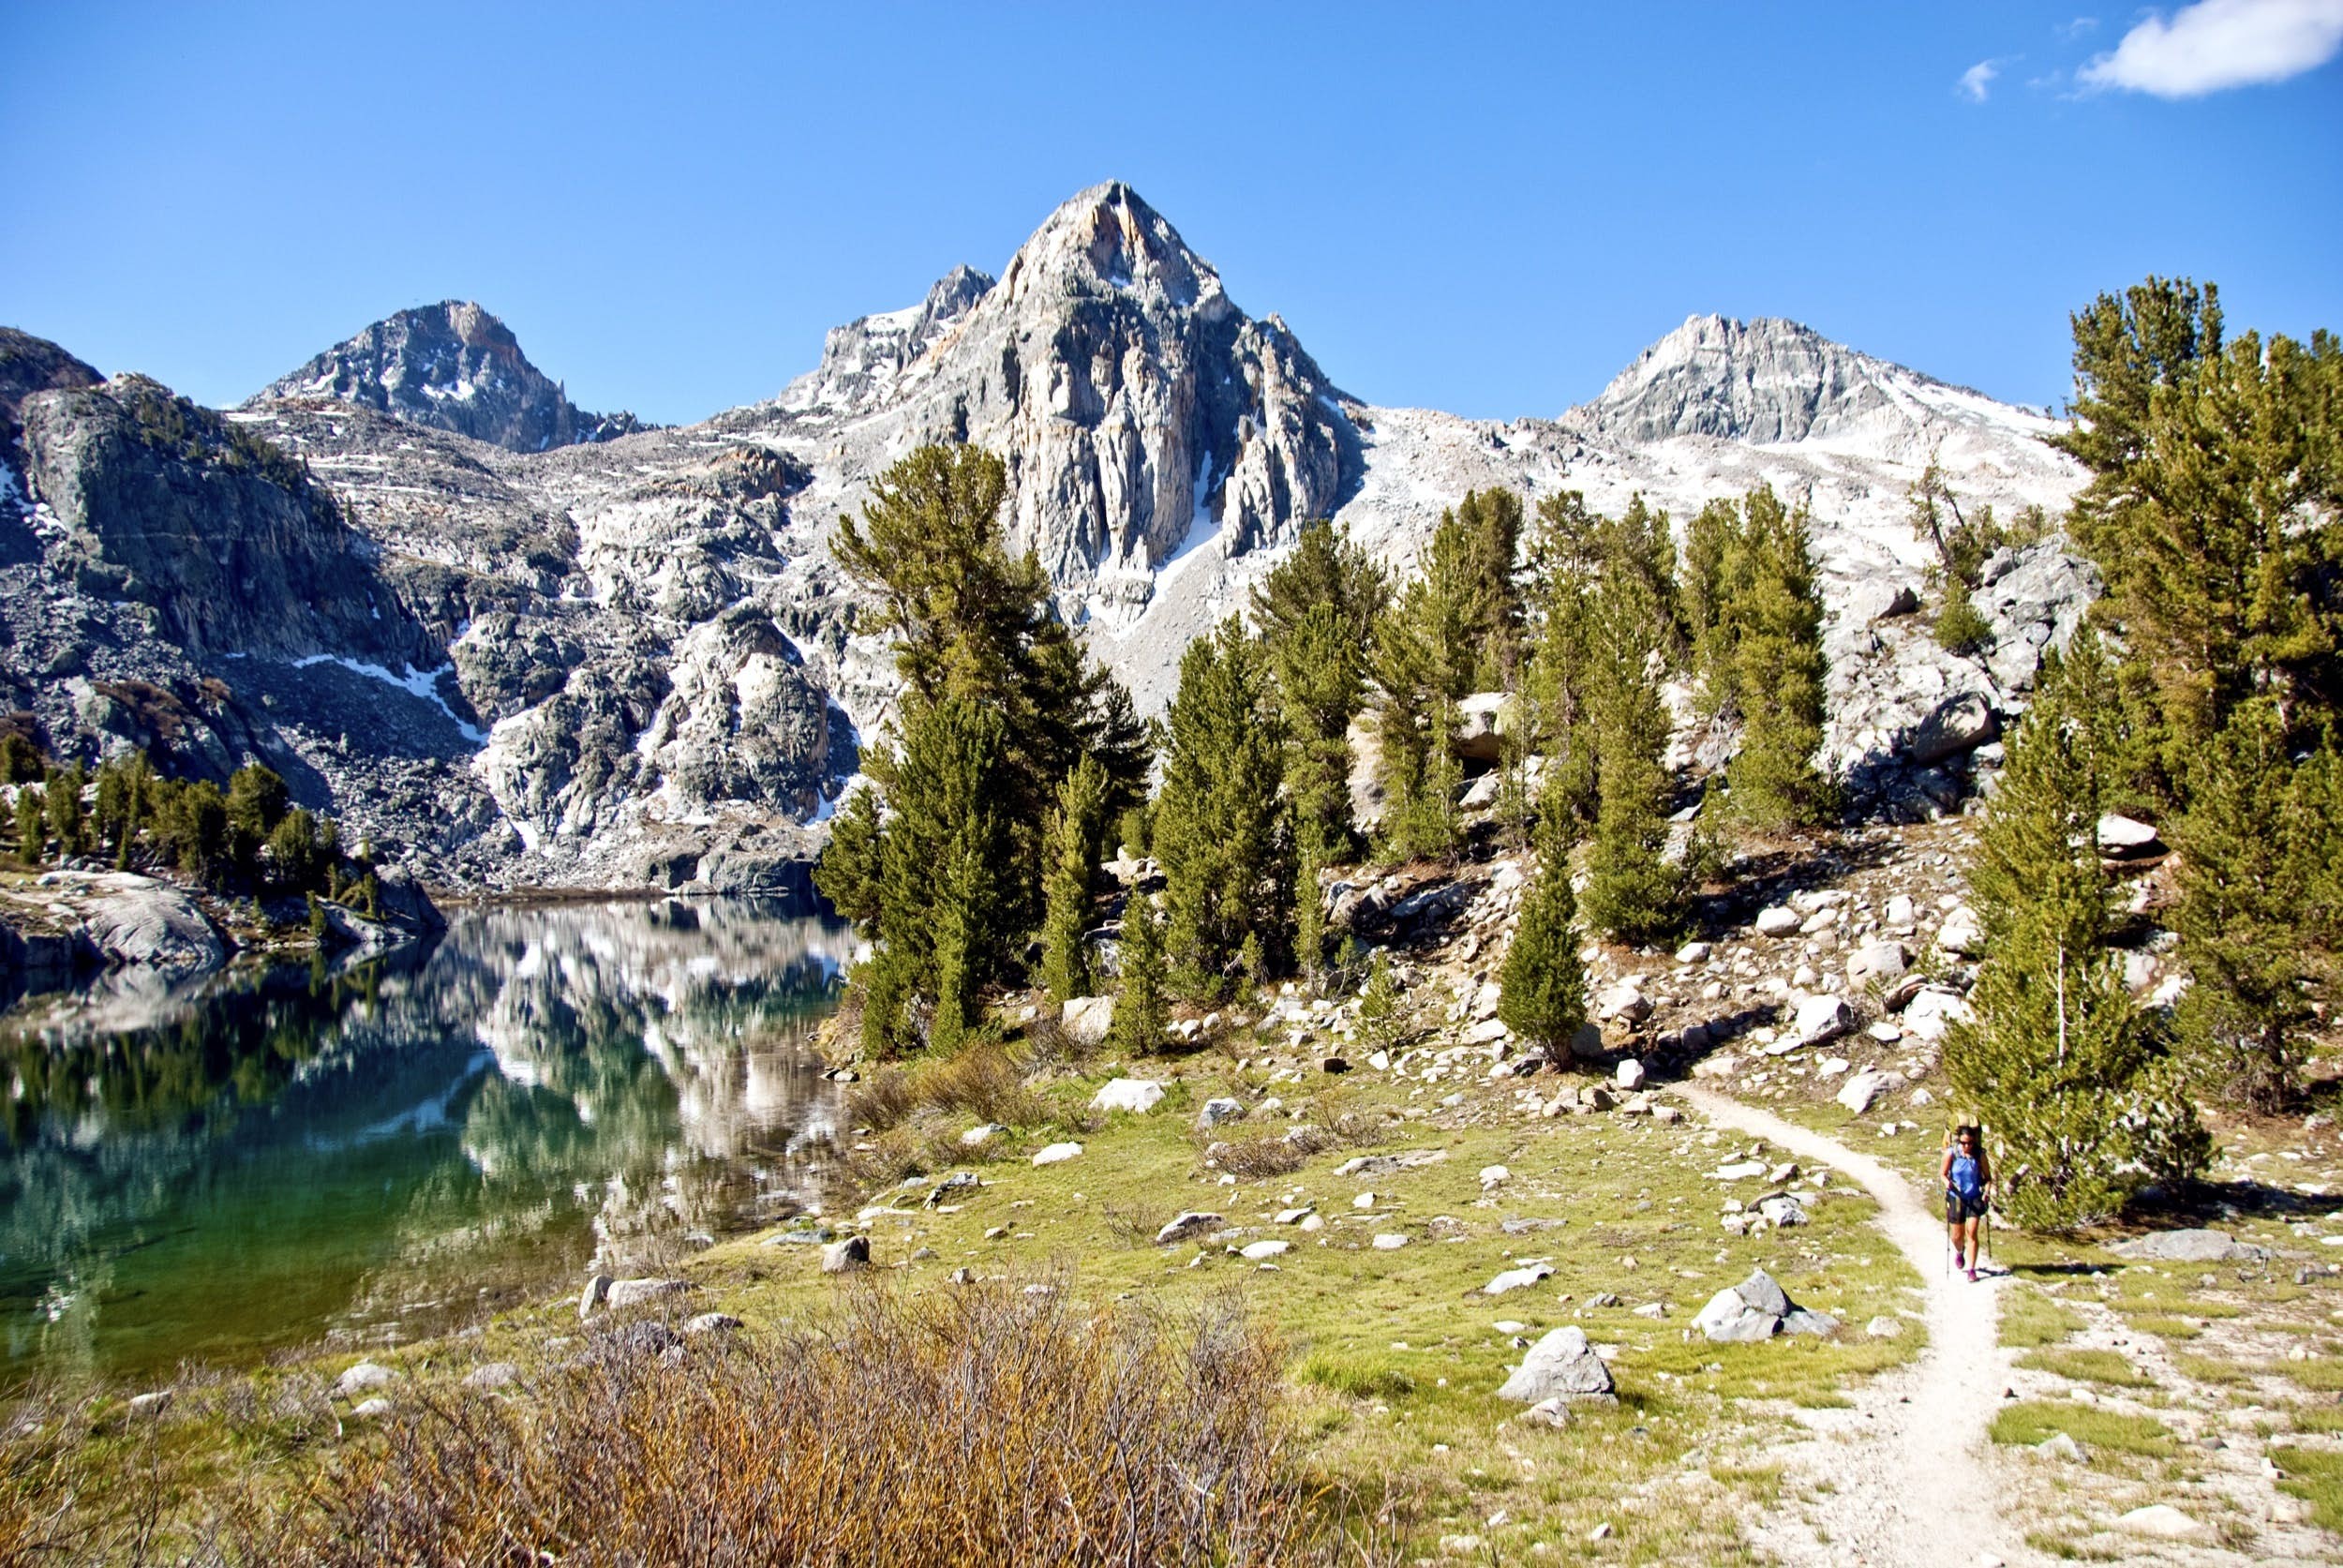
- The day kicks off with a thrilling suspension bridge crossing, followed by a long and hot climb up to Rae Lakes. Take advantage of the lakes as the perfect lunch and swimming spot. Afterwards, you'll tackle the rocky terrain of Glenn Pass, so tread carefully to avoid any ankle injuries. I found a campsite 1.5 miles into the Kearsarge Pass Trail, which was convenient for an early morning hike over Kearsarge Pass the next day for resupply.
Day 17: Kearsarge Pass Trail to Vidette Meadows (RESUPPLY)
- To reach your resupply point at Onion Valley, you'll need to hike up and over Kearsarge Pass twice in one day, which can be challenging. I recommend leaving your camp set up and hiking with an empty backpack or leaving behind your filled bear canister with heavy items. For more information about resupplying at Onion Valley, refer to the Resupply Strategy for the John Muir Trail.
- I pushed all the way to Vidette Meadows to shorten the distance to the climb up Forester Pass the following day. However, if you prefer not to go as far, there are alternative camping options available earlier along the trail.
Day 18: Vidette Meadows to Tyndall Creek
- This day involves the climb up Forester Pass, a long and challenging ascent. The stunning views along the way make it worthwhile, and you'll find a convenient creek halfway up to replenish your water and enjoy a well-deserved lunch break. The descent down to Tyndall Creek is relatively easy, providing a chance to catch your breath and prepare for the next leg of your journey.
Day 19: Tyndall Creek to Guitar Lake
- Consider this your "easy" day before your Mt. Whitney summit. You'll pass the 200-mile mark, reminding you of your incredible progress. Finally, you'll arrive at Guitar Lake, where finding a campsite with minimal wind is crucial. I was fortunate to discover a small cave that allowed for "cowboy" camping without setting up a tent. Enjoy the tranquil surroundings and prepare for the exhilarating summit ahead.
- I highly recommend summiting Mt. Whitney for sunrise on this day. Set your alarm early, around 1:15 AM, and start hiking before 2 AM to catch the magical sunrise. Be prepared for strong winds and cold temperatures, so dress warmly. At the junction near the summit, you can choose to drop your full pack and take only the essentials or leave your bear canister filled with heavy items.
Day 20: Guitar Lake to Whitney Portal
- As you reach Whitney Portal, you can celebrate the end of your epic adventure. Take some time to rest and recover, savoring the accomplishment of completing the entire John Muir Trail. Reflect on the challenges you overcame, the stunning landscapes you encountered, and the personal growth you experienced throughout the journey.
04. Wonderland Trail (Washington):
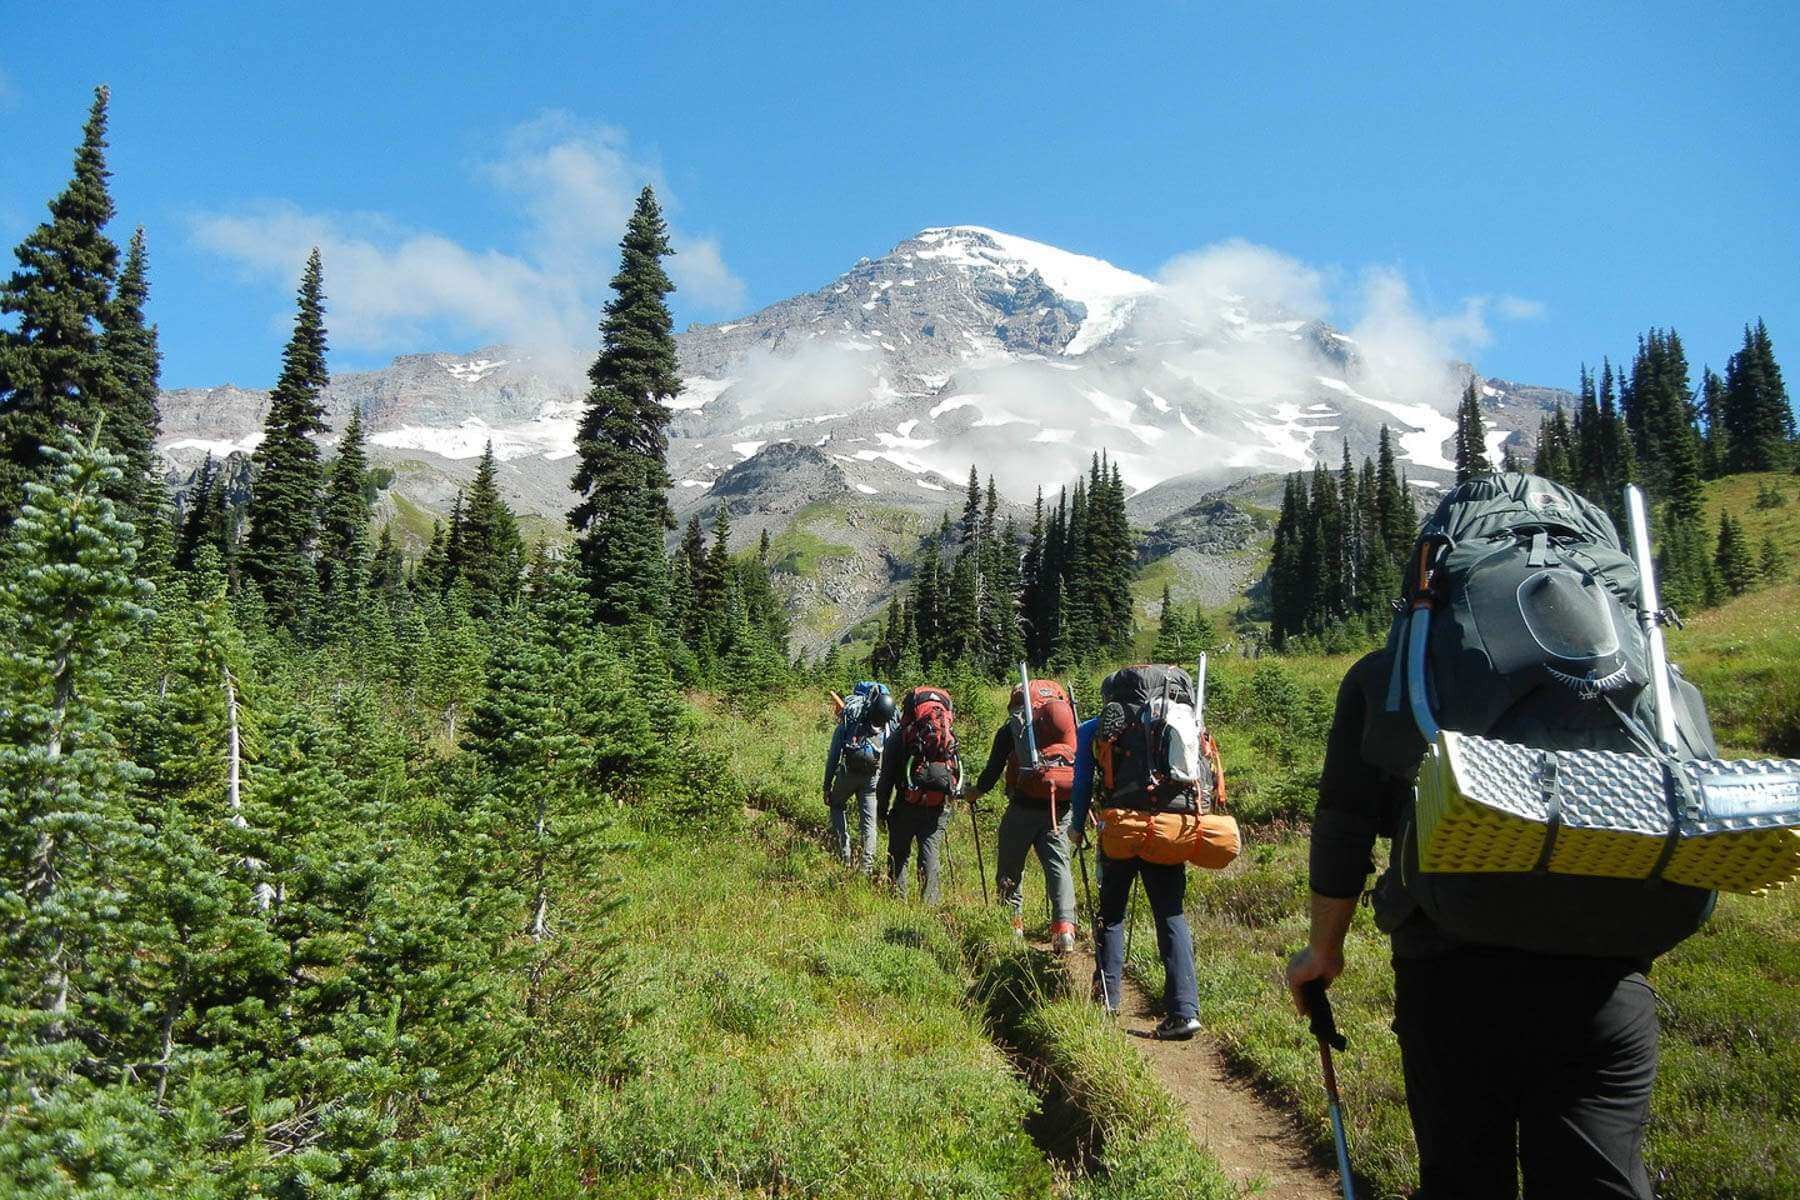
- Route: The Wonderland Trail is a 93-mile loop that circumnavigates Mount Rainier in Washington state. It offers breathtaking views of the mountain, alpine meadows, glaciers, and pristine wilderness.
- Distance: The entire Wonderland Trail is approximately 93 miles long.
- Days: The number of days required to complete the Wonderland Trail can vary depending on your hiking pace, fitness level, and desired itinerary. On average, hikers take around 8 to 10 days to complete the entire loop.
- Permit Required: Yes, a permit is required to hike the Wonderland Trail. It is a popular trail, and permits are issued through a lottery system. It's important to check the National Park Service's website for the most up-to-date information on permits and reservation procedures.
- Skill Level: The Wonderland Trail is considered a moderately strenuous trail. It involves significant elevation gains and losses, as well as challenging terrain. It is recommended for experienced hikers with good physical fitness and backcountry hiking skills.
- Suggested Time: The best time to hike the Wonderland Trail is during the summer months, typically from July to September when the snow has melted and the trail is more accessible. It's important to note that weather conditions can vary, and it's advisable to check current trail conditions before planning your trip.
- Highlights: The Wonderland Trail offers a range of stunning highlights, including up-close views of Mount Rainier, alpine meadows filled with wildflowers, pristine lakes, and picturesque waterfalls. Notable highlights include the Sunrise area, Mystic Lake, Indian Bar, Panhandle Gap, and Spray Park.
- Activities: Apart from hiking, there are several activities you can enjoy on the Wonderland Trail. These include wildlife viewing, birdwatching, photography, and fishing (with proper permits). The trail also provides access to side trails that lead to scenic viewpoints and other natural attractions.
- Scenic Drives: While the Wonderland Trail is primarily a hiking trail, there are scenic drives within Mount Rainier National Park that offer access to viewpoints and other attractions. Some popular scenic drives in the park include the Sunrise Road, Paradise Valley Road, and Stevens Canyon Road.
Travel Itineraries for Wonderland Trail (Washington):
Day 1: Start at Longmire - Sunrise (14 miles)
- Begin your adventure at Longmire, the starting point for many hikers. Follow the trail to the spectacular Sunrise area, enjoying beautiful vistas along the way. Set up camp near Sunrise and prepare for an unforgettable journey.
Day 2: Sunrise - Mystic Lake (10 miles)
- Continue your hike from Sunrise to Mystic Lake. Traverse through alpine meadows adorned with wildflowers and soak in the awe-inspiring views of Mount Rainier. Camp near the pristine Mystic Lake, surrounded by nature's tranquility.
Day 3: Mystic Lake - Indian Bar (12 miles)
- Embark on a scenic trek from Mystic Lake to Indian Bar. Marvel at the towering glaciers and rugged landscapes as you make your way through the trail. Indian Bar offers a serene camping spot, nestled amidst the wilderness.
Day 4: Indian Bar - Summerland (9 miles)
- From Indian Bar, head towards the enchanting Summerland. Traverse meadows bursting with vibrant colors and witness the grandeur of Rainier's glaciers up close. Set up camp at Summerland, a picturesque location with awe-inspiring views.
Day 5: Summerland - Mowich Lake (14 miles)
- Depart Summerland and venture towards Mowich Lake. Experience the diversity of Rainier's ecosystems as you pass through forests and subalpine terrain. Arrive at Mowich Lake, where you can relax and enjoy the tranquility of the surroundings.
Day 6: Mowich Lake - South Puyallup River (10 miles)
- Continue your journey from Mowich Lake to the South Puyallup River area. Traverse through dense forests and cross over scenic river crossings. Find a suitable camping spot near the river, allowing you to unwind amidst the soothing sounds of nature.
Day 7: South Puyallup River - Golden Lakes (8 miles)
- As you leave the South Puyallup River behind, make your way to the serene Golden Lakes. Pass through subalpine meadows and witness the captivating beauty of Rainier's glaciers. Set up camp near Golden Lakes, surrounded by pristine alpine scenery.
Day 8: Golden Lakes - Paradise River (9 miles)
- Depart from Golden Lakes and trek towards the Paradise River area. Encounter breathtaking views of Rainier and its glaciers as you traverse the trail. Find a suitable camping spot near Paradise River, immersing yourself in the serenity of the wilderness.
Day 9: Paradise River - Longmire (7 miles)
- On the final leg of your journey, make your way back to Longmire. Reflect on the incredible experiences and memories you've created along the Wonderland Trail. As you approach the end, celebrate your accomplishment and relish the beauty of the surroundings.
05. Continental Divide Trail (Rocky Mountains):
- Route: The Continental Divide Trail (CDT) follows the Continental Divide of the Americas, spanning approximately 3,100 miles from the Mexican border in New Mexico to the Canadian border in Montana. It passes through five states: New Mexico, Colorado, Wyoming, Idaho, and Montana.
- Distance: The entire Continental Divide Trail is approximately 3,100 miles long. However, the distance covered during a backpacking trip will depend on the specific section or sections you choose to hike.
- Days: The duration of a backpacking trip on the Continental Divide Trail varies depending on the section(s) you choose, your hiking pace, and any rest days you may take. Thru-hiking the entire trail typically takes around 4 to 6 months, but section hikes can be planned for shorter durations.
- Permit Required: There is no single permit required to hike the entire Continental Divide Trail. However, certain sections or areas along the trail may require permits or passes for camping or entry, such as in national parks or wilderness areas. It's important to research and obtain any necessary permits for the specific sections you plan to hike.
- Skill Level: The Continental Divide Trail is considered one of the most challenging long-distance trails in the United States. It traverses rugged and remote terrain, often at high elevations, with variable weather conditions. Thru-hiking the entire trail requires advanced backpacking skills, navigation abilities, and physical endurance. Section hikes can be chosen to match different skill levels.
- Suggested Time: The suggested time to hike the Continental Divide Trail varies depending on the section(s) and your hiking pace. Thru-hikes are typically started in late spring or early summer to take advantage of the best weather conditions. It's important to consider seasonal variations and plan accordingly for snow conditions, river crossings, and water availability.
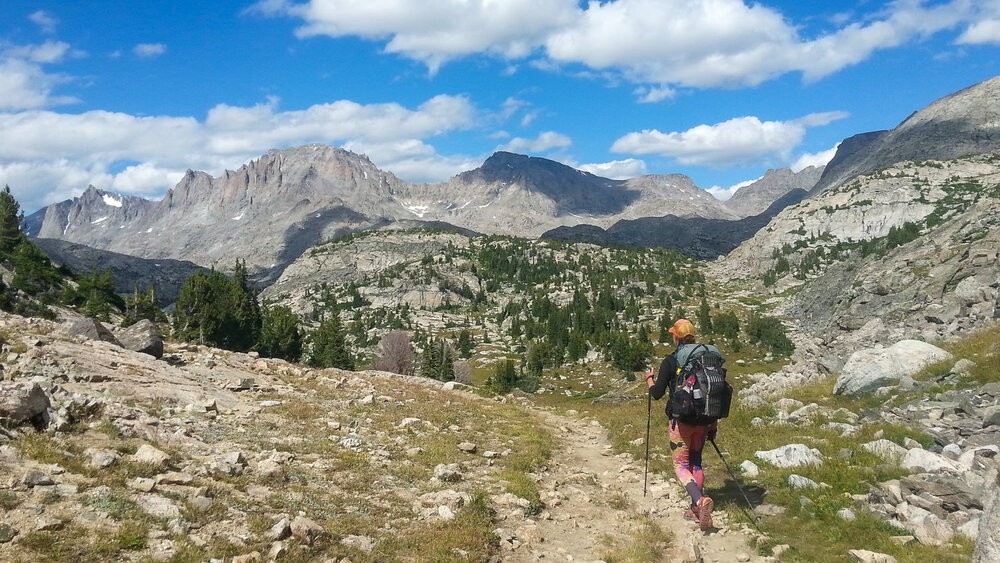
- Highlights: The Continental Divide Trail offers a range of stunning highlights, including panoramic mountain views, alpine lakes, high passes, and diverse ecosystems. Some notable highlights include the Gila Wilderness in New Mexico, the San Juan Mountains in Colorado, the Wind River Range in Wyoming, and Glacier National Park in Montana.
- Activities: The primary activity on the Continental Divide Trail is backpacking and hiking. However, there are also opportunities for wildlife viewing, birdwatching, fishing in certain areas, and exploring side trails to scenic viewpoints or nearby attractions. The trail also passes through several designated wilderness areas and national parks, providing additional recreational opportunities.
- Scenic Drives: While the Continental Divide Trail is primarily a hiking trail, there are several scenic drives that provide access to nearby areas and viewpoints along the route. Some scenic drives near the trail include the Trail Ridge Road in Rocky Mountain National Park, the Beartooth Highway in Montana and Wyoming, and the Going-to-the-Sun Road in Glacier National Park.
Note: The Continental Divide Trail traverses remote and challenging terrain, and careful planning, preparation, and experience are necessary for a successful backpacking trip. It's important to consult reliable resources, trail guides, and local authorities for up-to-date information on trail conditions, water sources, and safety considerations before embarking on a journey on the Continental Divide Trail.
Travel Itineraries for Continental Divide Trail (Rocky Mountains):
Day 1: Start at Mexican border in New Mexico
- Arrive at the Mexican border, the starting point of the Continental Divide Trail.
- Begin your hike, immersing yourself in the arid desert landscapes of New Mexico.
- Set up camp for the night.
Day 2-5: New Mexico
- Continue hiking north through the desert terrain, following the trail markers.
- Experience the unique rock formations and stunning vistas of the region.
- Take breaks to rest, hydrate, and refuel with trail snacks.
- Camp in designated areas along the trail or in suitable camping spots.
Day 6: Enter Colorado
- Cross into Colorado, leaving behind the desert landscapes and entering the Rocky Mountains.
- Enjoy the change in scenery and prepare for the challenges and beauty that lie ahead.
Day 7-20: Colorado
- Traverse through the alpine meadows, forests, and rugged peaks of the Colorado Rockies.
- Follow the trail markers and consult your maps to stay on track.
- Take advantage of opportunities to resupply in mountain towns along the way.
- Enjoy encounters with wildlife and breathtaking views of wildflowers.
- Rest and camp at established campsites or suitable spots along the trail.
Day 21: Enter Wyoming
- Cross into Wyoming, where vast wilderness and stunning mountain ranges await.
- Prepare for a new set of challenges and continue your journey north.
Day 22-40: Wyoming
- Explore the Wind River Range, known for its jagged peaks, pristine lakes, and abundant wildlife.
- Follow the trail through valleys and over mountain passes, enjoying the solitude of the wilderness.
- Take time to appreciate the beauty of the landscape and capture memorable photos.
- Camp in designated areas or suitable camping spots along the trail.
Day 41: Enter Idaho
- Enter Idaho, a state with diverse landscapes ranging from dense forests to high desert plateaus.
- Adjust to the changing terrain and prepare for new experiences.
Day 42-60: Idaho
- Hike through dense forests, follow crystal-clear streams, and navigate the undulating landscapes of Idaho.
- Encounter remote and untouched wilderness areas, savoring the solitude and natural beauty.
- Take breaks to rest, rejuvenate, and enjoy the peacefulness of your surroundings.
- Camp in designated areas or suitable spots along the trail.
Day 61: Enter Montana
- Reach Montana, the final state of your CDT thru-hike.
- Marvel at the grandeur of the landscapes as you make your way further north.
Day 62-90: Montana
- Experience the ruggedness of the Bob Marshall Wilderness and the beauty of Glacier National Park.
- Challenge yourself with the mountainous terrain and relish in the reward of stunning vistas.
- Stay vigilant for wildlife encounters, respecting their space and following safety guidelines.
- Set up camp in designated areas or suitable camping spots.
Day 91-120: Canadian Border
- Take time to reflect on your incredible accomplishment and the challenges you have overcome throughout the journey.
- Enjoy the breathtaking views and serene atmosphere near the Canadian border.
- Take photographs to commemorate this significant milestone.
- Make arrangements for transportation back to civilization, considering options such as shuttle services, public transportation, or coordinating with friends or family.
Note: Thru-hiking the entire Continental Divide Trail in one continuous trip is a challenging endeavor that requires careful planning, physical fitness, and wilderness skills. It's important to thoroughly research the trail, consult trail guides, and consider the appropriate gear, permits, and safety measures before undertaking such a journey. Additionally, weather conditions, trail closures, and other factors may impact your itinerary, so it's essential to stay informed and flexible during your hike.
06. Superior Hiking Trail (Minnesota):
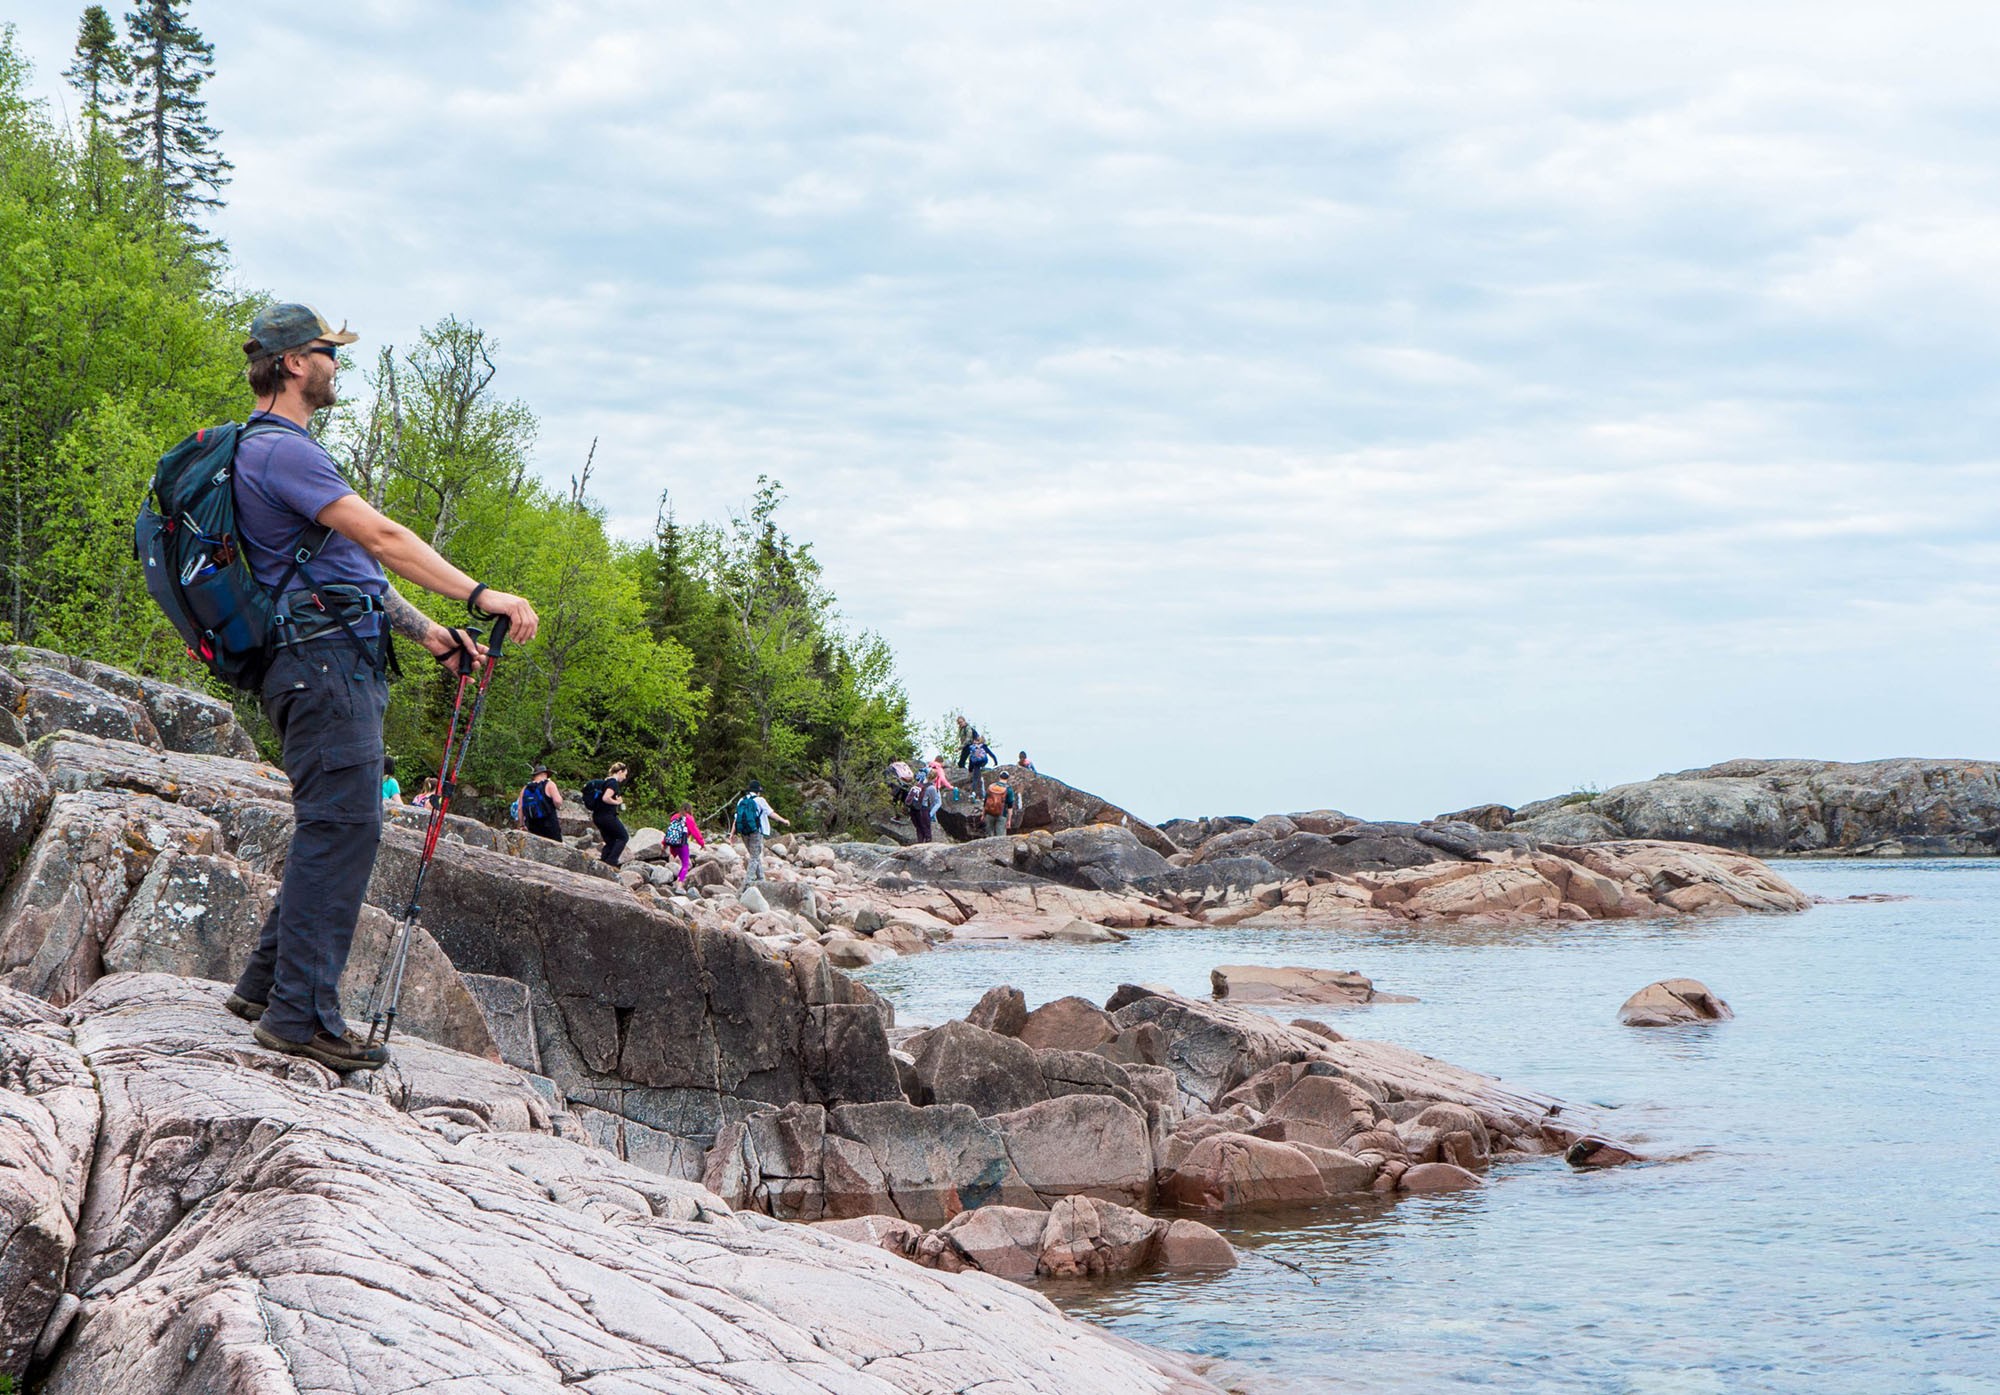
- Route: The Superior Hiking Trail (SHT) is a footpath that follows the North Shore of Lake Superior in northeastern Minnesota. It stretches from the Wisconsin border near Jay Cooke State Park to the Canadian border near Grand Portage.
- Distance: The Superior Hiking Trail is approximately 310 miles long.
- Days: The number of days required to hike the entire trail will depend on your hiking pace and whether you plan to do a thru-hike or a section hike. Thru-hikes can take around 2 to 4 weeks to complete, while section hikes can be planned based on the specific sections you want to hike and the time available.
- Permit Required: A permit is not required for day hiking on the Superior Hiking Trail. However, overnight camping permits are required for some sections of the trail. It's advisable to check with the Superior Hiking Trail Association or the managing authority for up-to-date permit requirements.
- Skill Level: The Superior Hiking Trail offers sections suitable for hikers of various skill levels. While some parts may have rugged terrain and elevation changes, there are also sections that are more accessible for beginners. It's recommended to assess your hiking experience and physical fitness and choose sections accordingly.
- Suggested Time: The best time to hike the Superior Hiking Trail is typically from late spring to early fall when the weather is favorable. However, the trail can be enjoyed year-round, with each season offering unique beauty. It's advisable to check trail conditions and weather forecasts before embarking on your hike.
- Highlights: The Superior Hiking Trail showcases the stunning beauty of the North Shore of Lake Superior. Highlights along the trail include breathtaking views of Lake Superior, waterfalls, deep forests, rocky cliffs, and diverse wildlife. Notable points of interest include Split Rock Lighthouse, Tettegouche State Park, Gooseberry Falls State Park, and Grand Portage State Park.
- Activities: Apart from hiking, the Superior Hiking Trail offers opportunities for camping, backpacking, birdwatching, photography, and nature exploration. Fishing and canoeing are also popular activities in some areas near the trail.
- Scenic Drives: While the Superior Hiking Trail is primarily a hiking trail, there are scenic drives along the North Shore that provide access to viewpoints and other attractions. Highway 61, also known as the North Shore Scenic Drive, runs parallel to the trail and offers stunning vistas of Lake Superior, waterfalls, and charming towns. Driving along this route allows you to experience the beauty of the area even if you're not hiking the entire trail.
Travel Itineraries for Superior Hiking Trail (Minnesota):
Day 1:
- Arrive at Jay Cooke State Park, Minnesota.
- Start your hike at the southern terminus of the Superior Hiking Trail.
- Hike approximately 10 miles to the first campsite at the Pine Ridge Camp.
Day 2-3:
- Continue northward through the beautiful forests and rocky terrain of the SHT.
- Pass by scenic overlooks and enjoy views of the St. Louis River.
- Camp at designated campsites along the way.
Day 4-6:
- Trek through the stunning landscapes of the Duluth section.
- Enjoy picturesque waterfalls, including Gooseberry Falls and Split Rock Falls.
- Camp at designated campsites or stay at one of the trailside shelters.
Day 7-9:
- Enter the rugged and remote section of the trail known as the Sawtooth Mountains.
- Hike through dense forests and encounter stunning vistas of Lake Superior.
- Camp at designated campsites or shelters.
Day 10-13:
- Traverse the scenic section from Temperance River State Park to Cascade River State Park.
- Experience breathtaking views of waterfalls, including the popular Devil's Kettle Falls.
- Camp at designated campsites along the trail.
Day 14-17:
- Journey through the Lutsen Mountains section, featuring rolling hills and stunning vistas.
- Pass by Caribou Falls and other points of interest.
- Camp at designated campsites or shelters.
Day 18-21:
- Reach the northernmost section of the trail near Grand Portage.
- Enjoy panoramic views of Lake Superior and the surrounding wilderness.
- Complete the thru-hike at the Canadian border near Grand Portage.
- Arrange for transportation back to your desired location for departure.
Note: This itinerary covers a thru-hike of the entire Superior Hiking Trail and can be adjusted based on your hiking pace and preferences. Make sure to plan your daily mileage, consider the availability of water sources, and check for any necessary permits or regulations along the trail. Additionally, be prepared for changes in weather conditions and consult trail maps, guidebooks, and official Superior Hiking Trail resources for the most up-to-date information before your hike.
07. Colorado Trail (Colorado):
- Route: The Colorado Trail spans approximately 486 miles from Denver to Durango, Colorado. It traverses the Rocky Mountains, passing through six wilderness areas and eight mountain ranges.
- Distance: The entire Colorado Trail is approximately 486 miles long. However, backpackers can choose to hike sections of varying lengths based on their preference and time constraints.
- Days: The number of days required to complete the Colorado Trail will depend on the section you choose to hike and your hiking pace. A thru-hike of the entire trail typically takes around 4 to 6 weeks.
- Permit Required: While there is no overall permit required to hike the Colorado Trail, some sections may require permits or reservations for camping. It's important to check specific regulations and obtain any necessary permits for the sections you plan to hike.
- Skill Level: The Colorado Trail is considered a moderately challenging trail, suitable for hikers with some backpacking experience. It involves significant elevation gain and loss, varying terrain, and potential weather challenges. Basic navigation and backcountry skills are recommended.
- Suggested Time: The best time to hike the Colorado Trail is generally from July to September when the snow has melted at higher elevations. This provides the best weather conditions and access to water sources. However, weather can vary, so it's important to check conditions before your trip. The suggested time for a thru-hike is approximately 4 to 6 weeks.
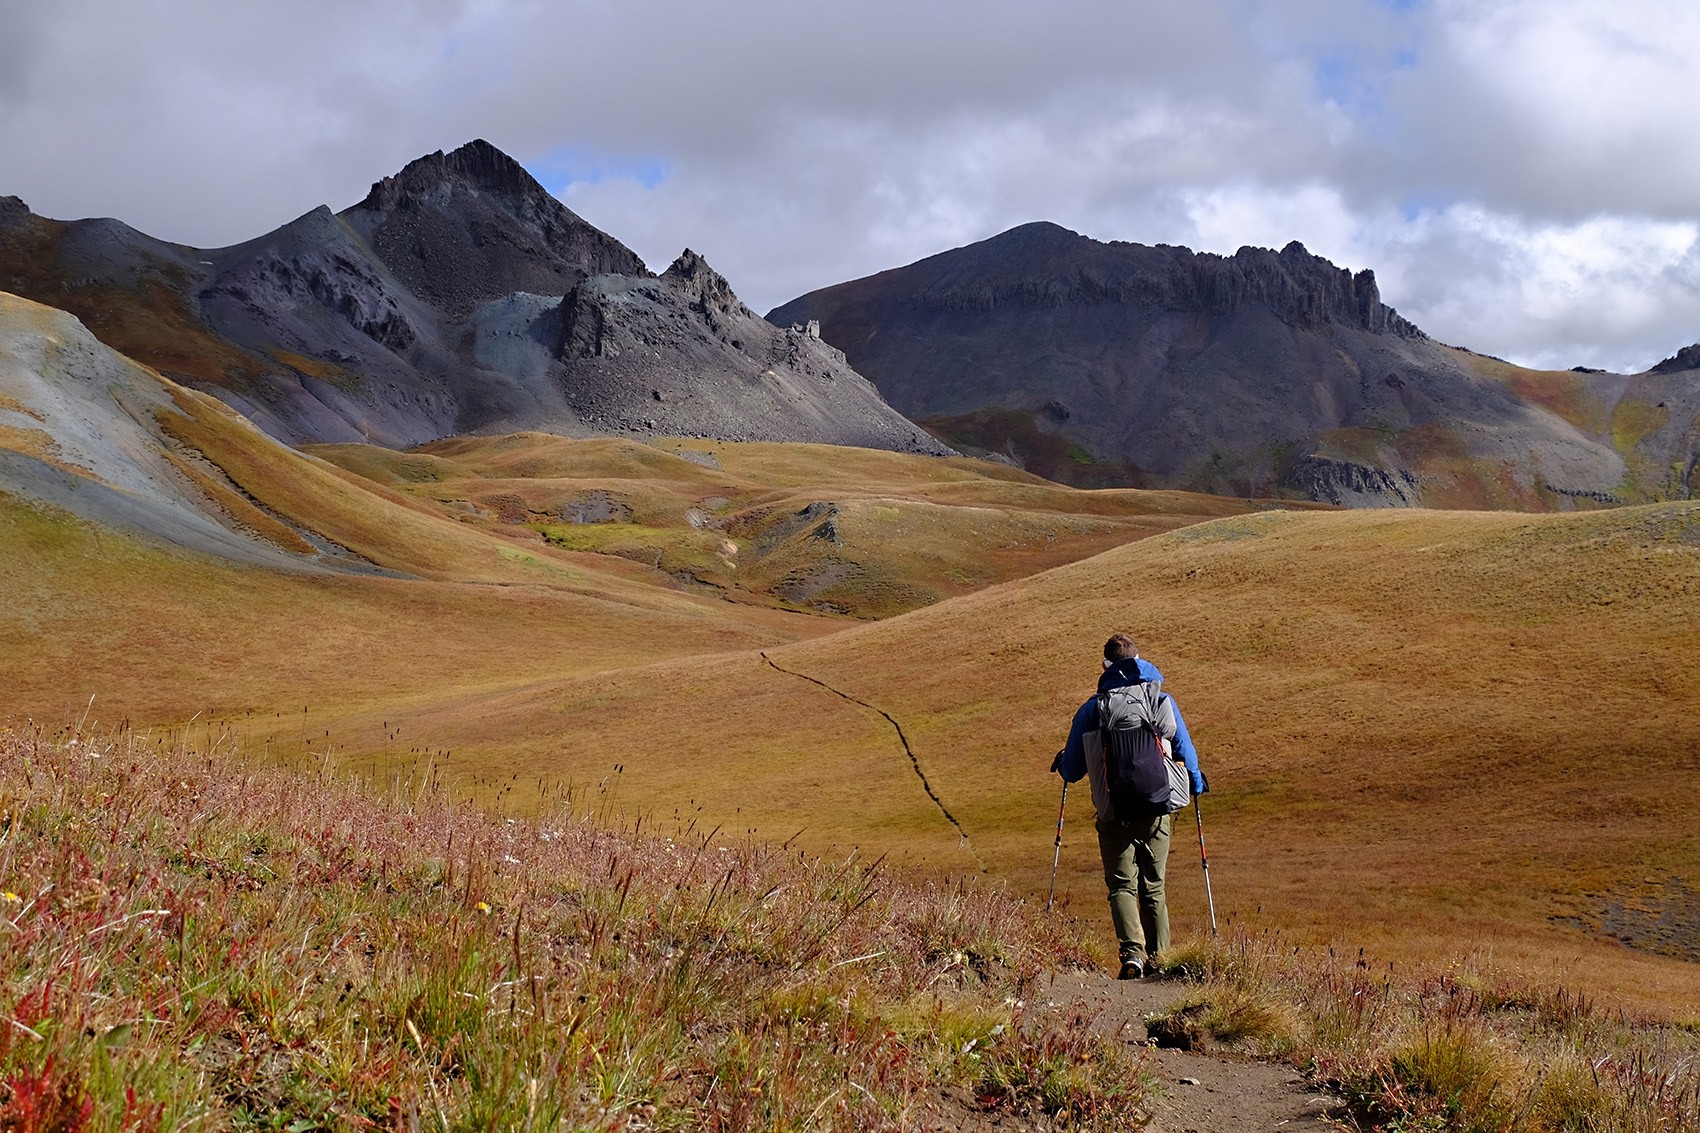
- Highlights: The Colorado Trail offers breathtaking alpine scenery, pristine mountain lakes, wildflower meadows, and diverse ecosystems. Some highlights along the trail include stunning views from segments such as the Collegiate Peaks, San Juan Mountains, and the Weminuche Wilderness. You'll also encounter charming mountain towns along the way, providing opportunities for resupply and rest.
- Activities: The primary activity on the Colorado Trail is backpacking and hiking. However, there are additional activities to enjoy, such as fishing in alpine lakes and streams (with a valid fishing license), wildlife viewing (including the chance to spot deer, elk, and bighorn sheep), and photography. Many sections of the trail also allow mountain biking, so you may encounter bikers during your hike.
- Scenic Drives: While the Colorado Trail is primarily a hiking trail, there are scenic drives that provide access to nearby areas and viewpoints. Some notable scenic drives near the trail include the San Juan Skyway, which takes you through the stunning San Juan Mountains, and the Trail Ridge Road in Rocky Mountain National Park, offering panoramic views of the alpine tundra.
Travel Itineraries for Colorado Trail (Colorado):
Week 1:
- Start your hike at the Denver terminus of the Colorado Trail.
- Hike approximately 70 miles through the rolling foothills and grasslands, passing through sections 1-3.
- Camp at designated campsites or suitable locations along the trail.
Week 2:
- Continue hiking through the scenic landscapes of segments 4-8.
- Pass through beautiful alpine meadows, dense forests, and encounter stunning views of the Rocky Mountains.
- Cover approximately 80-100 miles during this week and camp at designated campsites or suitable locations.
Week 3:
- Trek through segments 9-13, experiencing the diverse ecosystems of the Colorado Trail.
- Pass by high alpine lakes, towering peaks, and lush valleys.
- Hike approximately 80-100 miles and camp at designated campsites or suitable locations.
Week 4:
- Journey through segments 14-18, crossing through multiple mountain ranges and wilderness areas.
- Enjoy the solitude of the backcountry and encounter wildlife along the way.
- Cover approximately 80-100 miles during this week and camp at designated campsites or suitable locations.
Week 5:
- Traverse through segments 19-23, passing through stunning canyons, aspen groves, and open meadows.
- Hike alongside clear mountain streams and witness the natural beauty of the Colorado wilderness.
- Cover approximately 80-100 miles and camp at designated campsites or suitable locations.
Week 6:
- Continue through segments 24-28, reaching the final stretch of the Colorado Trail.
- Trek through evergreen forests, cross through alpine passes, and enjoy breathtaking views.
- Hike approximately 80-100 miles and reach the Durango terminus of the Colorado Trail, marking the end of your thru-hike.
Note: This itinerary provides a general framework for a 4 to 6-week thru-hike of the entire Colorado Trail. The mileage covered each week may vary based on your hiking pace and preferences. It's essential to plan your daily mileage, consider water sources and resupply points, and be prepared for changes in weather conditions. Consult trail maps, guidebooks, and official Colorado Trail resources for the most up-to-date information and ensure compliance with any necessary permits or regulations along the trail.
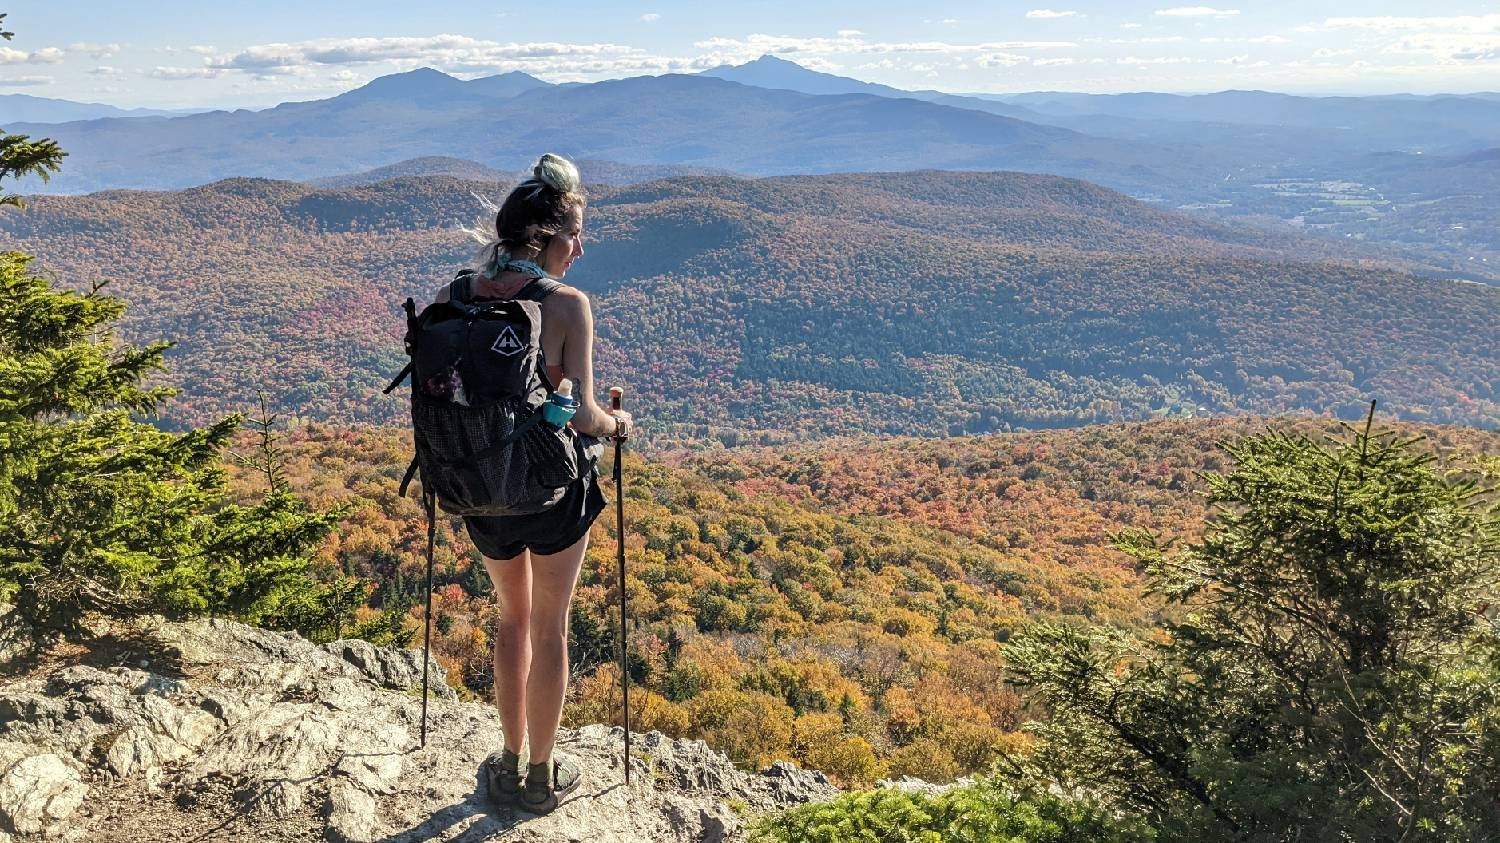
08. Long Trail (Vermont):
- Route: The Long Trail is a 272-mile trail that runs along the spine of the Green Mountains in Vermont. It starts at the Massachusetts-Vermont border and continues to the Canadian border, intersecting with the Appalachian Trail at its northern terminus.
- Distance: The Long Trail covers approximately 272 miles from end to end. However, the distance covered during a backpacking trip will depend on the specific section you choose to hike.
- Days: The number of days required to hike the Long Trail depends on the pace and hiking experience of the individual or group. Generally, it takes around 20 to 30 days to complete the entire trail, but this can vary.
- Permit Required: While there is no permit required to hike the Long Trail, camping permits are required for overnight stays at certain locations along the trail. These permits can be obtained from the Green Mountain Club, the organization responsible for maintaining the Long Trail.
- Skill Level: The Long Trail is considered a moderately challenging trail, suitable for hikers with intermediate to advanced skills. It features rugged and steep terrain, rocky sections, and significant elevation changes. Some experience with backpacking and navigation is recommended.
- Suggested Time: The Long Trail can be hiked during different seasons, but the most popular time is from late spring to early fall. During this time, the trail is generally clear of snow, and the weather is more favorable. It's important to consider weather conditions and plan accordingly.
- Highlights: The Long Trail offers a range of highlights, including scenic vistas, dense forests, alpine zones, and charming mountain communities. Some notable highlights include the challenging ascent of Mount Mansfield, the highest peak in Vermont, the stunning views from Camel's Hump, and the remote and wild sections in the northern part of the trail.
- Activities: Hiking is the primary activity on the Long Trail, allowing you to immerse yourself in the beauty of the Green Mountains. Along the trail, you can also enjoy wildlife spotting, birdwatching, photography, and exploring side trails that lead to waterfalls or viewpoints.
- Scenic Drives: While the Long Trail is primarily a hiking trail, there are scenic drives in Vermont that allow you to experience the beauty of the surrounding areas. Some scenic drives near the Long Trail include Route 100, which passes through picturesque towns and offers stunning views, and the Green Mountain Byway, which showcases the scenic landscapes of the region.
Travel Itineraries for Long Trail (Vermont):
Day 1:
- Start your hike at the southern terminus of the Long Trail, near the Massachusetts-Vermont border.
- Hike approximately 10 miles to the first shelter or campsite, Seth Warner Shelter.
Day 2-6:
- Continue hiking through the southern sections of the trail, passing through picturesque forests and valleys.
- Enjoy scenic overlooks and cross streams and rivers along the way.
- Camp at designated shelters or campsites each night.
Day 7-12:
- Traverse through the central sections of the Long Trail, experiencing the rugged beauty of the Green Mountains.
- Encounter challenging yet rewarding terrain and stunning vistas.
- Camp at designated shelters or campsites each night.
Day 13-18:
- Journey through the northern sections of the Long Trail, approaching the intersection with the Appalachian Trail.
- Hike through remote wilderness areas and enjoy panoramic views of the surrounding mountains.
- Camp at designated shelters or campsites each night.
Day 19-25:
- Reach the northern terminus of the Long Trail, where it intersects with the Appalachian Trail.
- Continue hiking along the combined Long Trail/Appalachian Trail to the Canadian border.
- Experience the final stretch of the trail and celebrate your accomplishment.
- Arrange for transportation back to your desired location for departure.
Note: This itinerary covers a thru-hike of the entire Long Trail and can be adjusted based on your hiking pace and preferences. Make sure to plan your daily mileage, consider the availability of water sources and resupply points, and check for any necessary permits or regulations along the trail. Additionally, be prepared for changes in weather conditions and consult trail maps, guidebooks, and official Long Trail resources for the most up-to-date information before your hike.
09. High Sierra Trail (California):
- Route: The High Sierra Trail (HST) is a 72-mile trail that starts in Crescent Meadow in Sequoia National Park and ends at the summit of Mount Whitney, the highest peak in the contiguous United States. The trail passes through the stunning Sierra Nevada mountain range in California.
- Distance: The High Sierra Trail covers approximately 72 miles from start to finish.
- Days: It's typically recommended to allow 7 to 10 days to complete the High Sierra Trail comfortably, depending on your hiking pace and the time you want to spend exploring side trails and taking in the scenery.
- Permit Required: Yes, a permit is required to hike the High Sierra Trail. The trail is within Sequoia and Kings Canyon National Parks, and permits can be obtained through a lottery system or on a first-come, first-served basis. It's important to check the specific permit requirements and application process with the National Park Service.
- Skill Level: The High Sierra Trail is considered a challenging hike, suitable for experienced hikers. It involves long daily distances, significant elevation gain and loss, and potentially hazardous conditions such as river crossings and high-altitude environments. Prior backpacking experience and physical fitness are recommended.
- Suggested Time: The best time to hike the High Sierra Trail is typically from mid-July to early September when snow has melted and conditions are more favorable. However, it's essential to check current trail and weather conditions before planning your hike.
- Highlights: The High Sierra Trail offers a range of incredible highlights, including breathtaking alpine scenery, pristine mountain lakes, rugged granite peaks, and picturesque meadows. Some notable highlights include the stunning Hamilton Lakes, the Kern River Canyon, the majestic Kaweah Peaks, and the summit of Mount Whitney.
- Activities: Hiking is the primary activity on the High Sierra Trail, allowing you to immerse yourself in the stunning natural beauty of the Sierra Nevada. Additionally, there are opportunities for fishing in the pristine alpine lakes along the trail, wildlife viewing, birdwatching, and photography. Some hikers also take side trips to explore scenic areas such as Precipice Lake or the Kern Hot Springs.
- Scenic Drives: While the High Sierra Trail itself is a hiking trail, there are scenic drives that provide access to the trailheads and nearby areas. For example, the drive to Sequoia National Park offers beautiful views of the giant sequoia trees and the Sierra Nevada foothills. Additionally, the drive along the Eastern Sierra Scenic Byway (Highway 395) provides stunning views of the eastern side of the Sierra Nevada and access to various trailheads.
Travel Itineraries for High Sierra Trail (California):
Day 1:
- Arrive at Crescent Meadow in Sequoia National Park.
- Start your hike on the High Sierra Trail, hiking approximately 8 miles to the Bearpaw Meadow campground.
- Enjoy the scenic beauty of the surrounding sequoia groves.
Day 2:
- Continue hiking along the High Sierra Trail, passing through stunning alpine meadows and forests.
- Hike approximately 9 miles to the Hamilton Lakes area and set up camp near the lakes.
Day 3:
- Explore the Hamilton Lakes area and take in the breathtaking views of the surrounding peaks.
- Optional day hike to Precipice Lake or other nearby destinations.
- Camp at the same location.
Day 4:
- Resume hiking along the High Sierra Trail, crossing over the Kaweah River and climbing higher into the mountains.
- Hike approximately 11 miles to the junction with the trail leading to the Kern Hot Springs.
- Camp at Junction Meadow or continue to Kern Hot Springs for an overnight stay.
Day 5:
- Continue hiking on the High Sierra Trail, gradually ascending towards the Kern Canyon.
- Pass through scenic landscapes and enjoy views of the Kern River.
- Hike approximately 8 miles and camp at the junction with the trail leading to Junction Meadow.
Day 6:
- Begin the ascent up the challenging switchbacks known as the "Golden Staircase."
- Reach Wallace Creek and camp at a suitable location nearby.
- Hike approximately 10 miles, taking your time to acclimate to the higher elevation.
Day 7:
- Resume hiking, crossing over the vast Tyndall Creek and entering the beautiful high alpine region.
- Hike approximately 10 miles to the Guitar Lake area, situated at the base of Mount Whitney.
- Camp at Guitar Lake and prepare for the summit push the next day.
Day 8:
- Wake up early and start the final ascent to the summit of Mount Whitney, the highest peak in the contiguous United States.
- Enjoy the incredible views from the summit and celebrate your accomplishment.
- Descend back to Guitar Lake and camp for the night.
Day 9:
- Descend from Guitar Lake, following the switchbacks and returning to the trailhead at Whitney Portal.
- Arrive at Whitney Portal and conclude your High Sierra Trail adventure.
10. Ozark Highlands Trail (Arkansas):
- Route: The Ozark Highlands Trail (OHT) is located in northwestern Arkansas and stretches from Lake Fort Smith State Park to the Buffalo National River. It traverses the beautiful Ozark Mountains, offering a diverse and scenic hiking experience.
- Distance: The Ozark Highlands Trail is approximately 218 miles long, providing ample opportunities for extended backpacking trips or shorter section hikes based on personal preference and time constraints.
- Days: The number of days required to complete the Ozark Highlands Trail will depend on your hiking pace, daily mileage, and whether you choose to hike the entire trail or only specific sections. A thru-hike typically takes around 10 to 14 days, while section hikes can vary in duration.
- Permit Required: There is no specific permit required to hike the Ozark Highlands Trail. However, some areas along the trail may have regulations regarding camping or specific permits for backcountry camping. It's advisable to check with the Ozark-St. Francis National Forest or relevant authorities for any specific requirements.
- Skill Level: The Ozark Highlands Trail is considered moderately difficult. It features rugged terrain with elevation changes, rocky sections, and occasional stream crossings. Some backpacking experience and basic navigational skills are recommended, although beginners with proper preparation and physical fitness can also enjoy sections of the trail.
- Suggested Time: The Ozark Highlands Trail can be hiked year-round, but the best times to hike are typically spring (April to May) and fall (September to November) when temperatures are milder. Summers can be hot and humid, while winters can bring colder temperatures and potential snow. It's important to consider weather conditions and personal comfort when planning your hike.
- Highlights: The Ozark Highlands Trail offers a range of highlights, including panoramic vistas, lush forests, cascading waterfalls, clear streams, and unique rock formations. Some notable highlights along the trail include Richland Creek Wilderness, Hemmed-in Hollow (the tallest waterfall between the Rockies and the Appalachians), and the stunning views from White Rock Mountain.
- Activities: The primary activity on the Ozark Highlands Trail is hiking, with opportunities for backpacking, day hikes, and overnight camping. Along the trail, you can also enjoy birdwatching, wildlife spotting, photography, fishing (in designated areas), and exploring the natural beauty of the Ozarks.
- Scenic Drives: While the Ozark Highlands Trail is primarily a hiking trail, there are several scenic drives in the surrounding area that offer access to stunning viewpoints and additional attractions. Some scenic drives worth exploring in the Ozarks include the Pig Trail Scenic Byway (Arkansas State Highway 23), the Talimena National Scenic Byway (Arkansas and Oklahoma), and the Ozark Highlands Scenic Byway (Arkansas State Highway 21).
Travel Itineraries for Ozark Highlands Trail (Arkansas):
Day 1:
- Start your hike at Lake Fort Smith State Park, the western terminus of the Ozark Highlands Trail.
- Hike approximately 10 miles to the first designated campsite or suitable location along the trail.
Day 2-3:
- Continue hiking through the scenic landscapes of the Ozark Mountains.
- Pass through dense forests, cross streams, and enjoy views of rugged terrain.
- Camp at designated campsites or suitable locations each night.
Day 4-5:
- Trek through picturesque valleys and upland plateaus, experiencing the beauty of the Ozarks.
- Enjoy the solitude of the backcountry and encounter wildlife along the way.
- Camp at designated campsites or suitable locations each night.
Day 6-7:
- Journey through sections with stunning overlooks and unique geological features.
- Hike along ridges and explore the rugged beauty of the Ozark Highlands.
- Camp at designated campsites or suitable locations each night.
Day 8-9:
- Traverse through forests and cross pristine streams as you continue along the trail.
- Enjoy the serenity of the natural surroundings and take in the beauty of the Buffalo National River region.
- Camp at designated campsites or suitable locations each night.
Day 10-11:
- Approach the Buffalo National River, one of the highlights of the Ozark Highlands Trail.
- Hike along the river, taking in the scenic views and potential for water-based activities.
- Camp at designated campsites or suitable locations each night.
Day 12:
- Complete your hike at the eastern terminus of the Ozark Highlands Trail near the Buffalo National River.
- Arrange for transportation back to your desired location for departure.
Planning a backpacking trip in the United States in 2025 promises to be an unforgettable adventure. With its vast and diverse landscapes, the USA offers a plethora of opportunities for explorers seeking to immerse themselves in nature, culture, and history. From the rugged beauty of national parks like Yosemite and the Grand Canyon to vibrant cities such as New York and San Francisco, there is something to captivate every traveler's interest. With careful research and preparation, backpackers can create a customized itinerary that encompasses their desired destinations and activities. Moreover, with advancements in technology and the availability of online resources, planning the perfect trip has become more accessible than ever before.
So, grab your backpack, map out your route, and get ready to embark on an extraordinary journey through the remarkable landscapes and diverse tapestry of the United States.


{{item.get_author.first_name}} {{item.get_author.last_name}}
Level 7
5 Photos
36 Reviews
{{item.comment_txt}}
{{item_reply.get_author.first_name}} {{item_reply.get_author.last_name}}
@ {{item_reply.reply_to}}, {{item_reply.reply_txt}}